Tag: volunteer safety

  • Cold Weather Preparation for Outdoor Volunteers

    Cold Weather Preparation for Outdoor Volunteers

    The hail came sideways that morning. Three volunteers and I huddled beneath a tree while rides kept canceling, and I watched wet gloves turn stiff before we made the only sensible call: we stopped, got warm, and went home.

    That experience changed how I lead outdoor crews. Cold weather preparation isn't a clothing checklist. It connects warmth, safety, transportation, timing, communication, and morale into one field logistics problem. When people lose feeling in their hands or stop thinking clearly, the cleanup ends whether the leader planned for it or not.

    Why Cold Weather Preparation Matters for Volunteers

    On a freezing cleanup day, trouble often appears in small signals. A volunteer says, “I'm fine,” while rubbing one hand against a sleeve. Another keeps working with a soaked cuff. A third goes quiet and stops joking. If I wait for everyone to admit they are cold, the weather has already started directing the work.

    Wind changes the calculation quickly. The National Weather Service says a wind chill of -20°F can cause frostbite in about 30 minutes (National Weather Service guidance on extreme cold). Fingers, ears, noses, and cheeks usually lose the fight first because wind removes heat from exposed skin, while wet fabric draws warmth away from the body.

    Cold exposure also carries a wider health burden. A global modeling study in The Lancet Planetary Health estimated that non-optimal ambient temperatures were associated with about 5.08 million deaths per year worldwide from 2000 to 2019. It attributed 4.59 million of those deaths to cold, roughly 8.52% of global deaths annually (The Lancet Planetary Health study00081-4/fulltext)). Those figures cannot decide whether a cleanup should continue on one particular morning. They do establish cold exposure as a genuine health hazard, not a minor inconvenience.
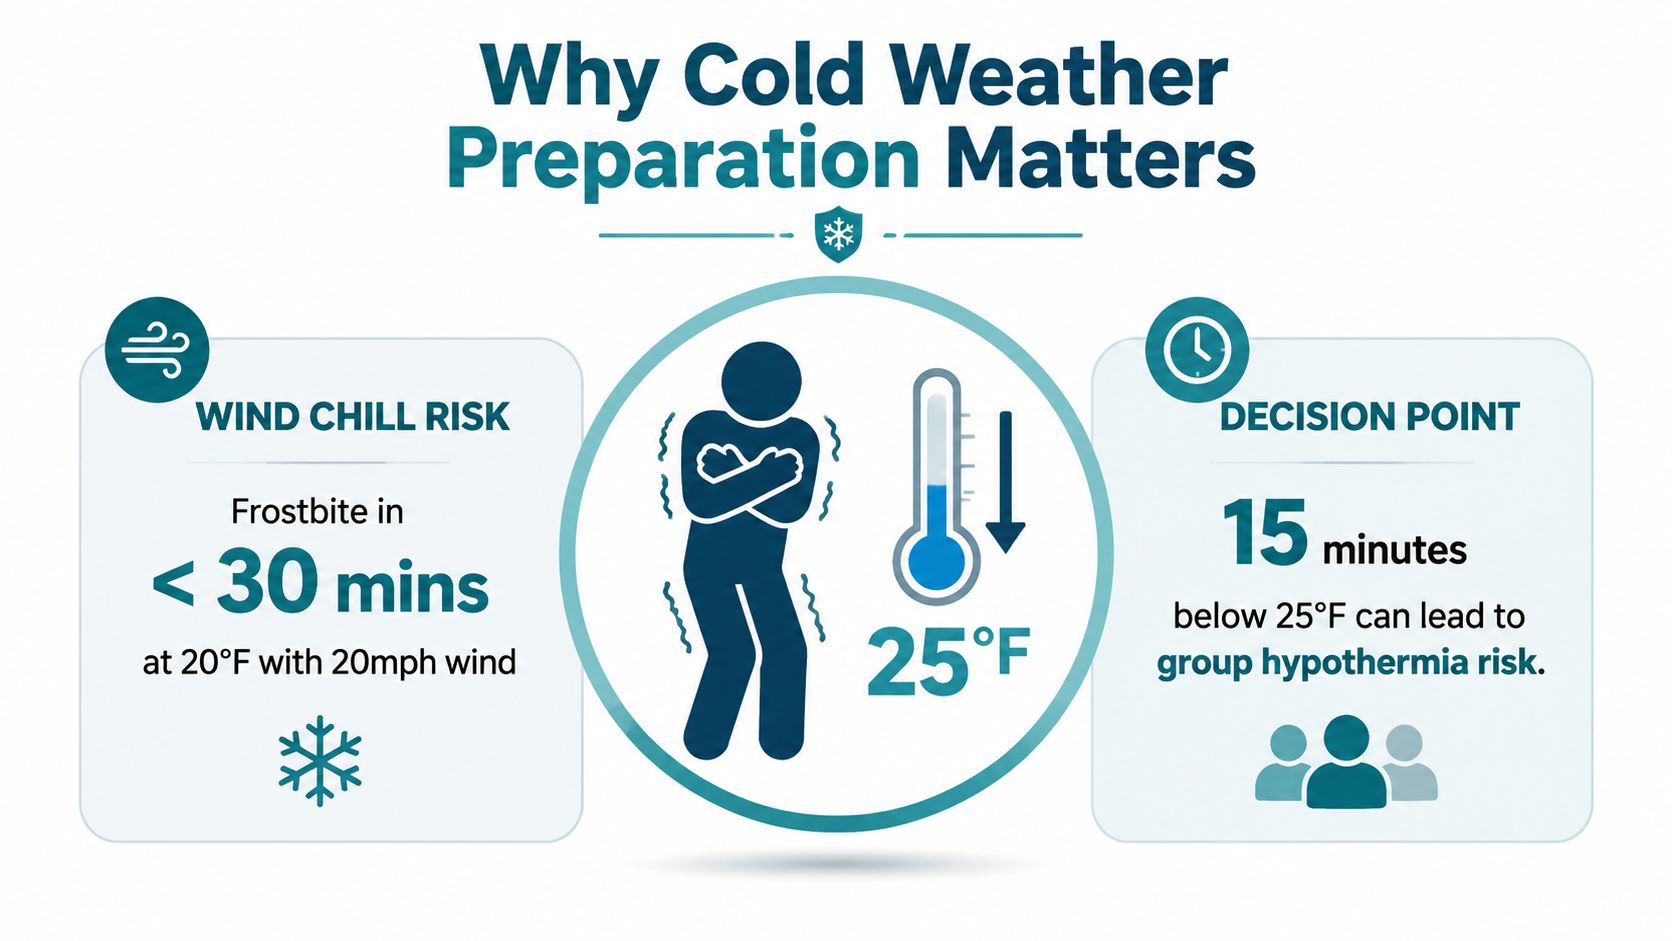
    An infographic titled Why Cold Weather Preparation Matters, showing frostbite risks and hypothermia decision points.

    Morale belongs in the safety plan

    Cold changes group behavior before it produces an obvious injury. Volunteers rush, skip warming breaks, hide discomfort, and make poorer decisions around ice, traffic, tools, and unstable debris. One frightened or badly chilled person can pull the crew toward panic when nobody knows who can stop the event or where people should warm up.

    Field rule: If the group cannot get warm, communicate clearly, and move safely, the workday is already over.

    England's winter health review identifies year-round planning and winter preparedness and action as the first two stages of its Cold Weather Plan (England winter weather and health review). That sequence matches practical volunteer leadership. Plan before the forecast looks dramatic, then act early when conditions reach the limits you set. Warmth, safety, and morale depend on the same logistics: clothing must preserve function, buddies must notice symptoms, and shelter must be close enough that volunteers will use it.

    Layering and Gear That Actually Works

    Start with the layer touching the skin. Choose a moisture-wicking synthetic or wool base layer that moves sweat away from your body. Cotton feels comfortable at the start, yet it stays wet after exertion and then chills you when you slow down.

    The middle layer traps warm air. Fleece or a synthetic insulated jacket works well because it adds warmth without making movement impossible. The outer shell blocks wind and rain while allowing some moisture to escape. NIOSH recommends this three-layer system, along with loose clothing that preserves circulation (NIOSH cold stress guidance).
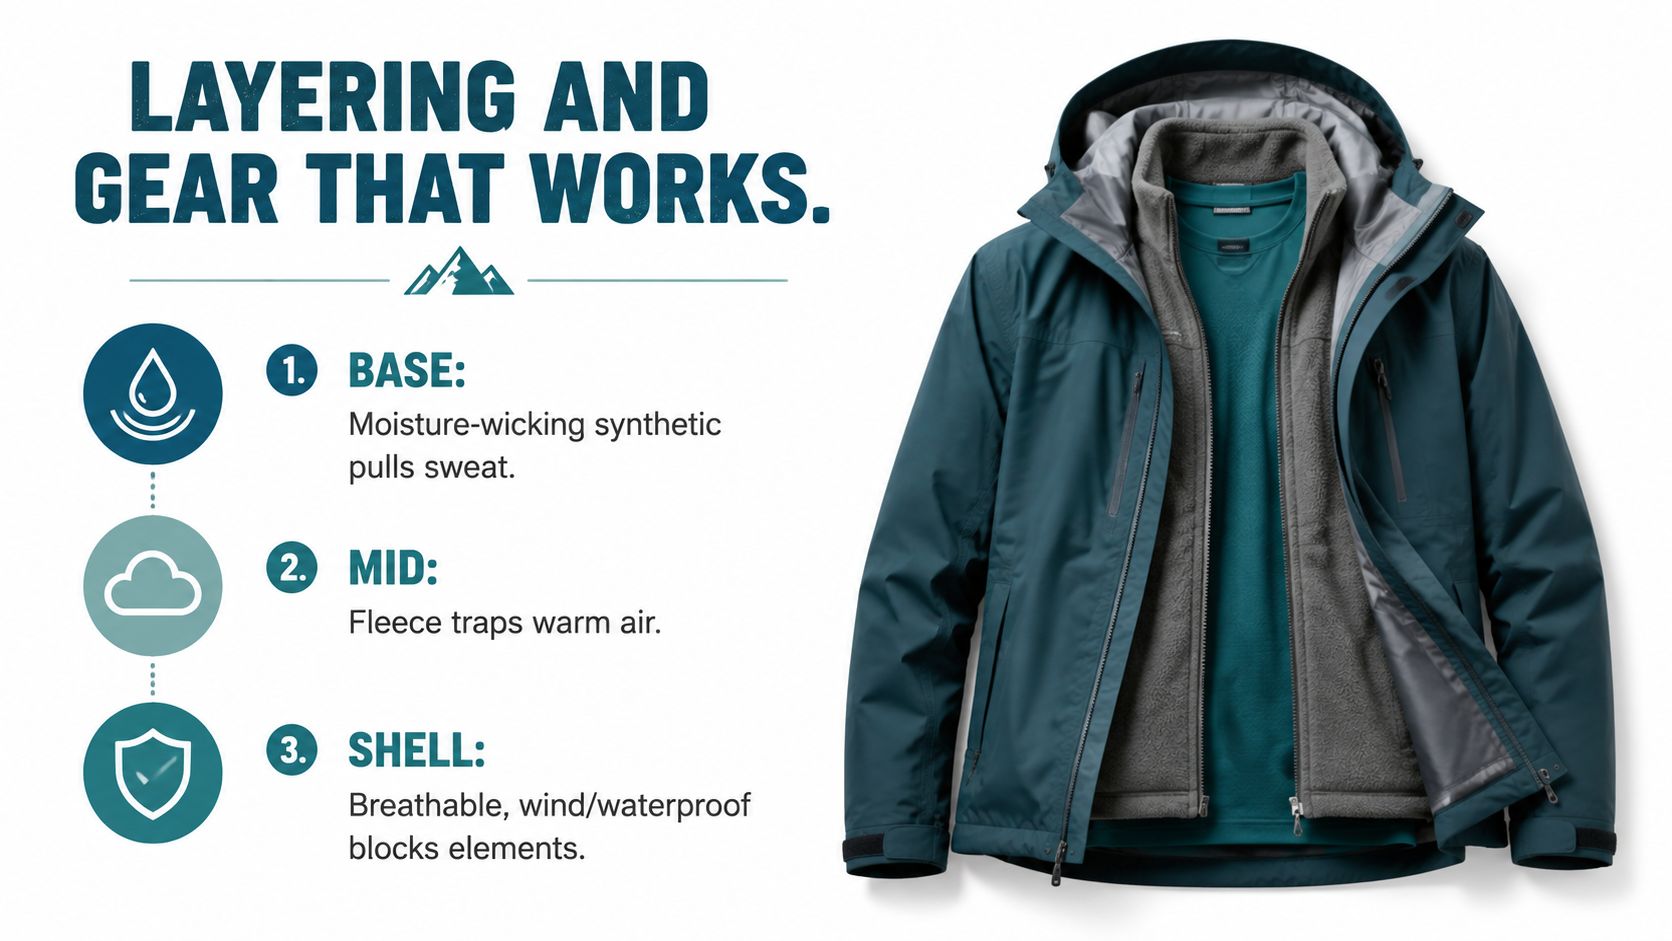
    A diagram explaining the three-layer clothing system for cold weather, featuring a base layer, fleece, and waterproof shell.

    Fit decides whether layers help

    You need room to move and enough space for warm air between layers. Zip the jacket, bend at the waist, and raise both arms before work begins. If the clothing pulls tight across your stomach or shoulders, add a larger shell rather than compressing the layers underneath.

    Protect the parts volunteers forget:

    • Feet: Wear waterproof insulated boots with wool socks. Pack backup socks in a sealed bag.
    • Head and neck: Use a warm hat with a balaclava or neck gaiter when wind reaches the face.
    • Hands: Wear insulated gloves with thin liners underneath. Keep spare gloves in a dry bin.
    • Pockets: Store hand warmers where volunteers can reach them before their fingers go numb.
    • Backpack: Carry a dry base layer sealed in a gallon bag, so a soaked shirt doesn't end the shift.
    • Group supplies: Bring extra hats, gloves, socks, jackets, and dry clothes. People lose gear, underestimate the cold, or arrive dressed for a short walk instead of active work.

    Schedule demanding cold jobs for the warmest part of the day, and assign relief workers when exposure lasts a long time, as NIOSH advises. Rotate people before they become exhausted. If your group handles overnight response or remote support, compare packable sleeping bag options before an event, since compact emergency sleep gear can support a shelter plan when travel gets disrupted.

    Clothing also belongs beside injury prevention. Use the group's injury prevention strategies to pair warmth checks with safe lifting, tool handling, and movement on frozen ground.

    Pre-Event Planning and Communication

    The night before an outdoor event, I want fewer surprises than the forecast can provide. Check the hourly temperature, wind chill, precipitation type, and sunset time. Then decide the latest conditions you'll accept and write that decision into the event message.

    A useful plan has three messages. The first confirms the meeting point and start time. The second states what each person must bring, including a base layer, hat, gloves, and waterproof footwear. The third gives a clear go or cancel threshold, so volunteers don't travel while guessing.

    Build the plan around people

    Use a roster that includes phone numbers, emergency contacts, transportation notes, and any information volunteers choose to share about medical or mobility needs. Assign one person to make the final call. Group consensus sounds friendly, but it slows decisions when weather turns.

    A buddy system catches problems earlier than a leader walking past a dozen people. Pair volunteers and ask each pair to watch for pale skin, soaked gloves, unusual silence, heavy shivering, and clumsy movement. Nobody should work alone or move beyond the group's hearing range.
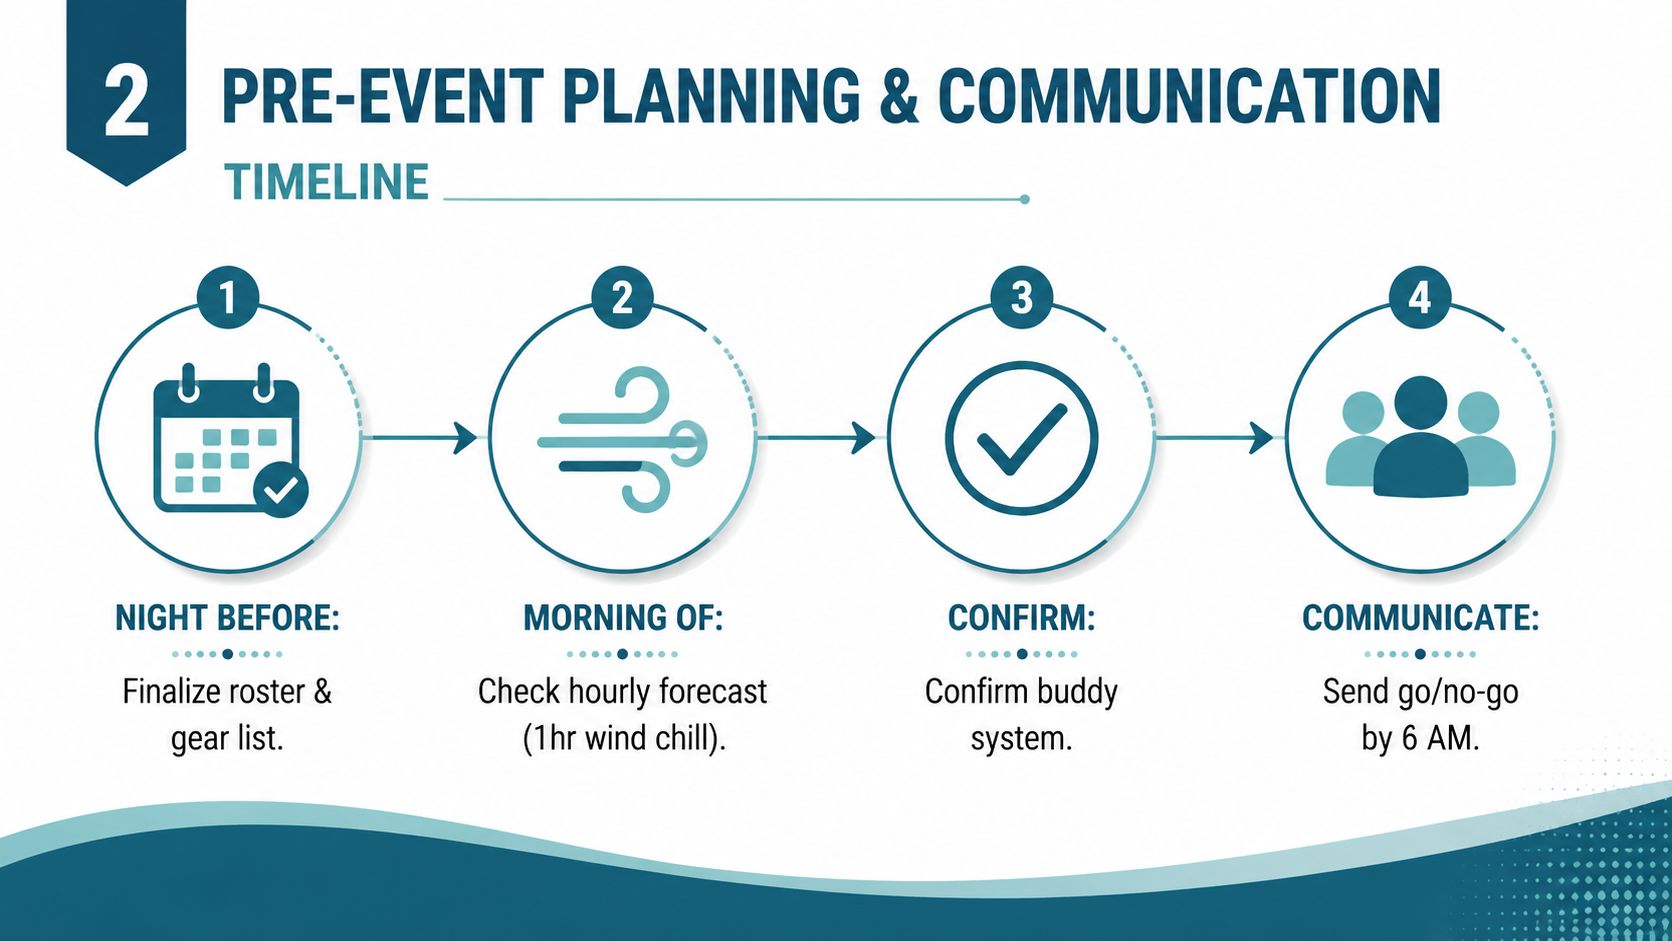
    A flowchart detailing a four-step pre-event planning and communication timeline for outdoor activities in cold weather.

    Walk the site before tools come out

    Arrive early enough to inspect the route and work zone. Look for black ice, exposed metal, frozen puddles, steep edges, and unstable footing. Cold hands make small hazards harder to manage, so move the work boundary or remove the task before volunteers arrive.

    Keep the event message short enough to read outside. Link the team to a practical volunteer safety checklist and ask people to confirm their clothing before they leave home. A person who says, “I forgot gloves,” should receive a spare pair or a clear instruction to stay home, not pressure to improvise.

    Frostbite and Hypothermia Risk in Real Time

    You spot a volunteer standing too still near the north fence line. Check their hands, face, clothing, speech, and coordination before asking about the task. A thermometer cannot show soaked layers, fatigue, tight boots, or cold metal contact, all of which can shorten safe working time. Someone sweating during active hauling may cool rapidly once they stop.

    NOAA cold-weather operations guidance places a 30-minute exposure limit in at least the moderate-risk category, a 10-minute limit in the high-risk category, and a 5-minute limit in the extremely high-risk category (NOAA cold-weather operations guidance). Use these as operating limits, not comfort goals. Shorten shifts, add relief, or stop before symptoms force the decision.

    A wind chill of -20°F can produce frostbite in about 30 minutes, but that window does not apply equally to every volunteer. Wet gloves, restricted circulation, poor-fitting boots, and exhaustion can change the outcome. Set field rules around the most vulnerable conditions you can reasonably expect, not the strongest person in the group.

    Use a simple field alert system

    Green: Work in planned blocks. Buddies check faces, hands, clothing, and behavior while the lead keeps warming access available.

    Amber: Shorten shifts, increase checks, and move wet or numb volunteers indoors. Reassign exposed tasks before discomfort becomes impaired movement.

    Red: End outdoor work for exposed volunteers. Move anyone with confusion, slurred speech, severe clumsiness, persistent shivering, or pale, waxy skin to warmth, then seek medical help when symptoms concern you.

    Use the table as a pocket field reference. It adds staffing actions to the exposure categories, so the lead can adjust for wetness, wind, symptoms, and the group's actual pace.

    Exposure category Shift duration Buddy-check frequency Volunteer action
    At least moderate risk Short planned blocks At each task change and before relief Keep warming access ready and rotate exposed work
    High risk Brief shifts with relief At every handoff Restrict exposed tasks and move people through warming breaks
    Extremely high risk No exposed outdoor shift Before anyone leaves shelter End exposed outdoor work

    CDC mortality data recorded 1,024 U.S. deaths attributed to excessive cold or hypothermia in 2023, with 19.9% occurring in January (CDC mortality data cited in the CDC winter cold reference). A leader does not need to calculate a new threshold on site. Set the limit before the event, and let symptoms override the schedule.

    Warming Breaks and On-Site Care

    A warming break succeeds only if volunteers can use it before their hands and judgment deteriorate. I have seen crews crowd around a vehicle, hold one hand near a vent, and return to work while boots and gloves were still wet. The group looked supported, but no one had recovered enough to work safely.

    Set a 50/10 rhythm: 50 minutes of active work, then 10 minutes of structured warming. As conditions worsen, shorten the work block to 40 minutes with 15 minutes of warmth, then use 30/20 when exposure becomes difficult to control. Post the schedule on the site board and cover it in the opening briefing. A planned break feels like part of the job, not a personal failure.

    Build a shelter people want to enter

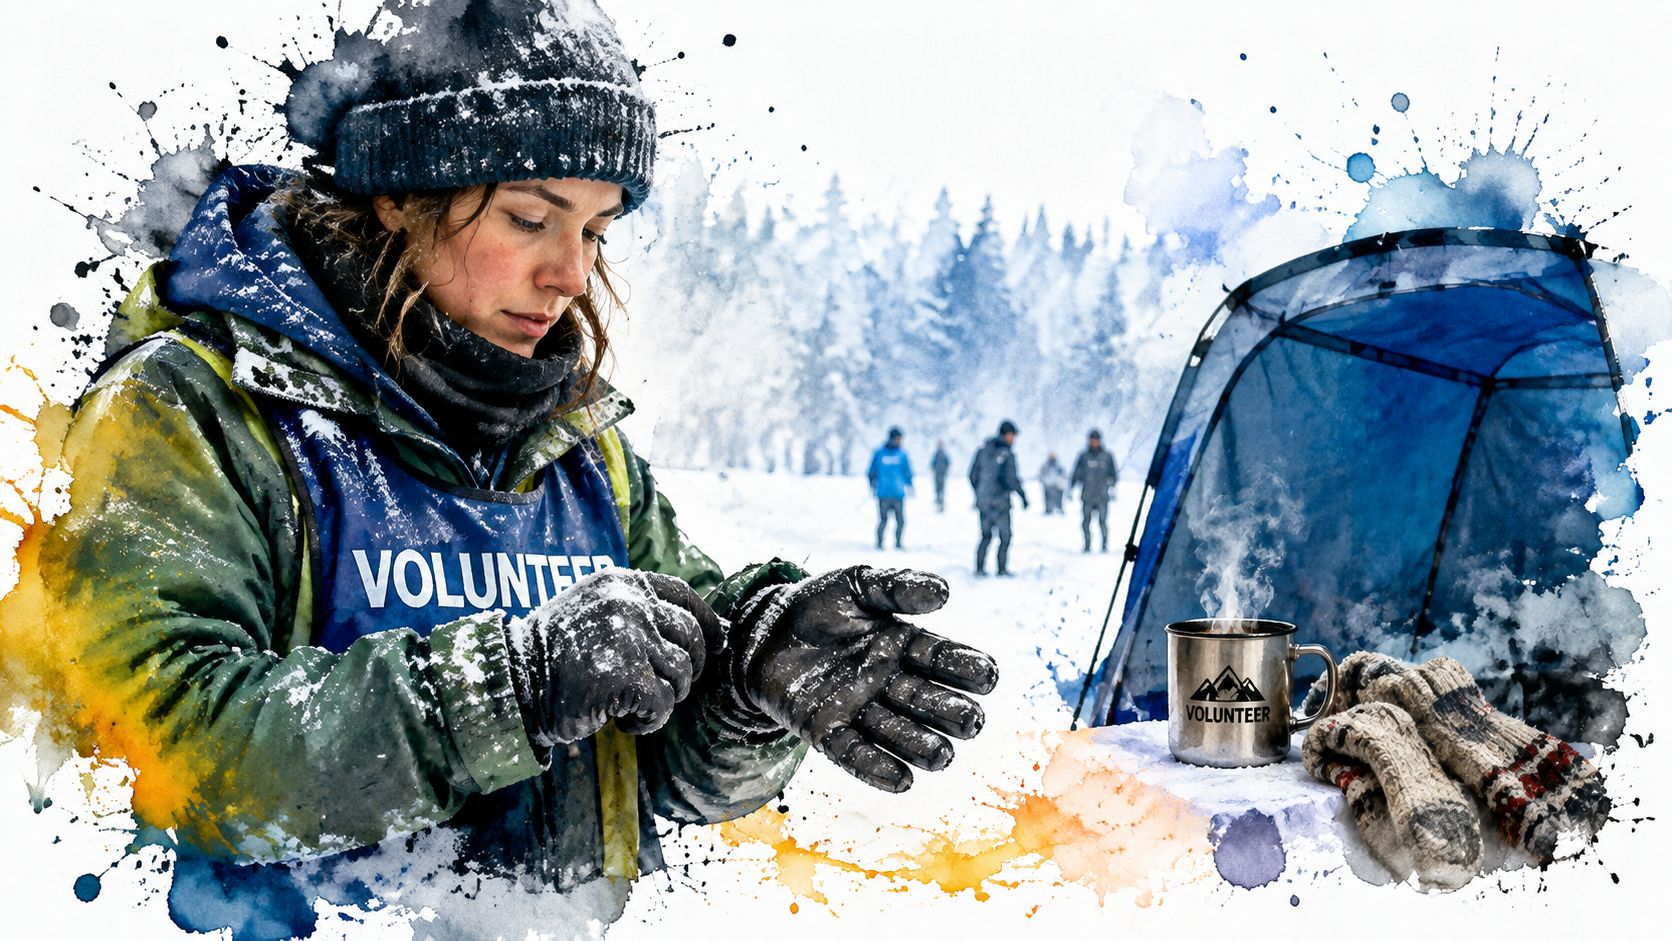
    Place a heated vehicle or pop-up shelter close to the work area. Stock it with dry gloves, spare socks, hand warmers, blankets, and warm calorie-dense drinks in a thermos rotation. Keep fuel-burning heaters outside enclosed spaces unless an appropriate ventilation plan is in place. Never use a propane heater where carbon monoxide can collect.

    Rotate tasks instead of leaving one volunteer with the coldest assignment. Someone hauling wet debris or digging frozen soil can work in a short burst, then switch to sorting bags near the shelter. This keeps people active while limiting the exposure that drains warmth and morale.
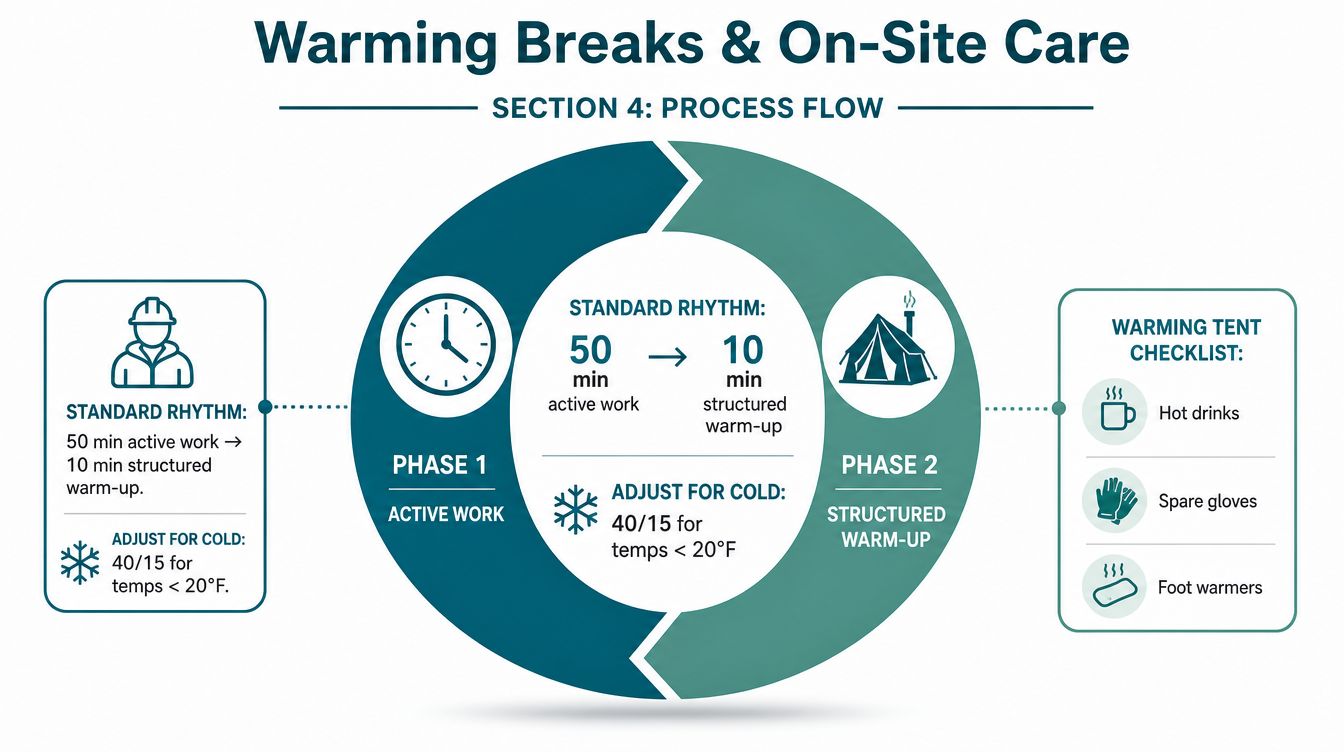
    A diagram illustrating a two-phase cycle for cold weather work, alternating between active work and structured warm-up breaks.

    During each break, ask volunteers to check fingers and toes for numbness, unusual color, or reduced movement. Watch the person who has stopped complaining. Quiet may mean comfort, but it may also signal confusion, fatigue, or reduced awareness of danger.

    Break standard: A volunteer should leave the warming area able to speak clearly, move normally, and feel their hands well enough to handle ordinary tasks.

    Use the following video as a visual reminder of how an organized work and warming cycle can run:

    Transportation, Shelter, and Contingency Plans

    A warm crew can still get into trouble if the vehicles sit far away or the backup space can't hold everyone. Choose parking close to the work area, reserve one heated vehicle for emergency warming, and identify an indoor location that can take the full crew within ten minutes.

    Stage supplies the night before:

    • Dry replacements: Spare gloves, wool socks, hats, and hand warmers.
    • Emergency insulation: Mylar blankets and extra jackets.
    • Heating equipment: A propane heater with a clear ventilation plan.
    • Communication: A charged phone, power bank, and incident contact list.
    • Site access: Shovel, traction material, and a route that avoids the worst ice.

    Set contingency triggers before the first bag moves. Lightning, black ice, sustained winds above 25 mph, or any volunteer showing warning signs should prompt a pause or cancellation. The single decision-maker then shortens the event without asking a shivering group to debate.

    Transportation needs its own backup. Make a carpool list, record public transit options, and assume some drivers won't arrive. A no-one-drives-cold policy keeps tired, shivering volunteers off the road. If snow or ice changes the route, use the group's blizzard safety tips before asking people to travel.

    Food planning matters after the event, too. Ready.gov says to keep refrigerators and freezers closed during a winter power outage, and to throw away food that reaches 40°F or higher for two hours or more (Ready.gov winter readiness guidance). Assign one person to handle food decisions instead of letting volunteers make uncertain choices while tired.

    Volunteer Wellbeing and Post-Event Follow-Up

    After Chicago hailstorms and winter cleanups, the work is not finished when the last bag reaches the vehicle. Within 24 hours, hold a short debrief and ask what nearly went wrong. Log numb fingers, missed breaks, wet clothing, transportation failures, and shelter problems while details remain clear. The record should change the next gear plan, staffing decision, or cancellation trigger.

    Send each volunteer a personal thank-you that names their contribution. “Thanks for sorting the sharp debris near the fence” carries more weight than a generic group message. Ask whether symptoms continued after warming up, and encourage medical care when someone remains concerned.

    Give people a reason to return

    Retention depends on repeated proof that the group sees volunteers as people, not labor. Rotate leadership so one person does not always take the coldest or wettest assignment. After a difficult event, schedule an indoor gathering with drinks, food, and a brief conversation about what the crew accomplished.

    Recognition can take the form of photos, shoutouts, or partner organizations, when volunteers welcome that attention. Litter Caterpillars runs volunteer trash pickups in Chicago, including winter events, offering organizers a practical model for pairing outdoor service with group care.

    A volunteer who leaves cold, tired, or discouraged may not return, and could face greater risk at the next event without a better plan. Treat the event log, gear bin, warming break, and thank-you message as one leadership system. Cold weather preparation is care that continues from the first forecast check to the next invitation.

    Visit Litter Caterpillars to find Chicago cleanup events where volunteer safety and group connection guide the work. Review your layers, pack dry backups, and join prepared to serve without treating cold exposure as a test of toughness.
  • Injury Prevention Strategies for Volunteer Cleanup Crews

    Injury Prevention Strategies for Volunteer Cleanup Crews

    You're standing beside a bus lane on a cold Saturday morning, one hand on a grabber and the other wrapped around a trash bag that's already too full. A tire fragment slides under your boot. Someone reaches for a shiny piece of metal near the curb. Traffic moves closer than expected. Cleanup work can turn from friendly service into an emergency in a few seconds.

    I've spent three years at weekly Chicago cleanups in rain, heat, snow, and sudden hail. The crews that stay safe don't rely on luck or a loud “watch out.” They plan the site, match equipment to hazards, watch the weather, and give volunteers permission to stop before a small problem becomes a serious injury. These injury prevention strategies belong in the plan before the first bag opens.

    Why Injury Prevention Belongs at Every Cleanup

    One Saturday, a volunteer lunged toward a slippery tire chunk beside a bus lane. Her boot lost traction, and she went down hard. The crew lead caught her arm before her shoulder hit the pavement, but the near miss exposed several gaps. Nobody had assigned a traffic watcher. The tire sat in a slick patch. The morning briefing had covered litter zones, yet nobody had discussed unstable debris near moving vehicles.

    That moment stayed with me because the volunteer hadn't acted recklessly. She saw something the crew wanted removed and tried to help. Good intentions can still put a person in danger when the plan leaves hazards unassigned.

    Injuries follow people home

    A sprained ankle can mean missed work shifts, canceled family plans, and weeks away from the cleanup group. A cut from a hidden shard can keep a regular volunteer off the street while the wound heals. The organizer carries another burden, too. If someone ignores a known hazard or sends people into an unsafe area without controls, the group may face liability and a damaged relationship with its volunteers.

    The World Health Organization reports that injuries and violence caused 4.4 million deaths in 2019, equal to 8% of deaths worldwide. Unintentional injuries caused about 3.16 million of those deaths, while violence-related injuries caused about 1.25 million. Low- and middle-income countries carried roughly 90% of injury-related deaths, according to the World Health Organization's injuries and violence fact sheet.

    Cleanup crews usually deal with smaller hazards, but the planning lesson still applies. Injury prevention covers traffic, falls, cuts, weather exposure, lifting, and sudden medical problems. Volunteers show up expecting care. They shouldn't have to prove toughness to earn it.

    Practical rule: If a hazard can be predicted, assign a control before the event starts.

    Start the plan the night before

    Check the forecast, inspect the route, charge phones, stage first aid supplies, and decide who can stop work. Use engineering and environmental controls whenever you can. A safer route, a moved sign-in table, a blocked-off hole, or a traffic buffer does more than repeated reminders about attention.

    WHO lists measures including seat belts, child car seats, smoke detectors, flame-resistant clothing, designated drivers, and fencing around water as proven injury controls. Its prevention model follows four actions, measure the problem, identify causes, design and apply interventions, then evaluate the results. The same approach works on a Chicago cleanup route. Record the hazards, change the setup, and learn from what happened.

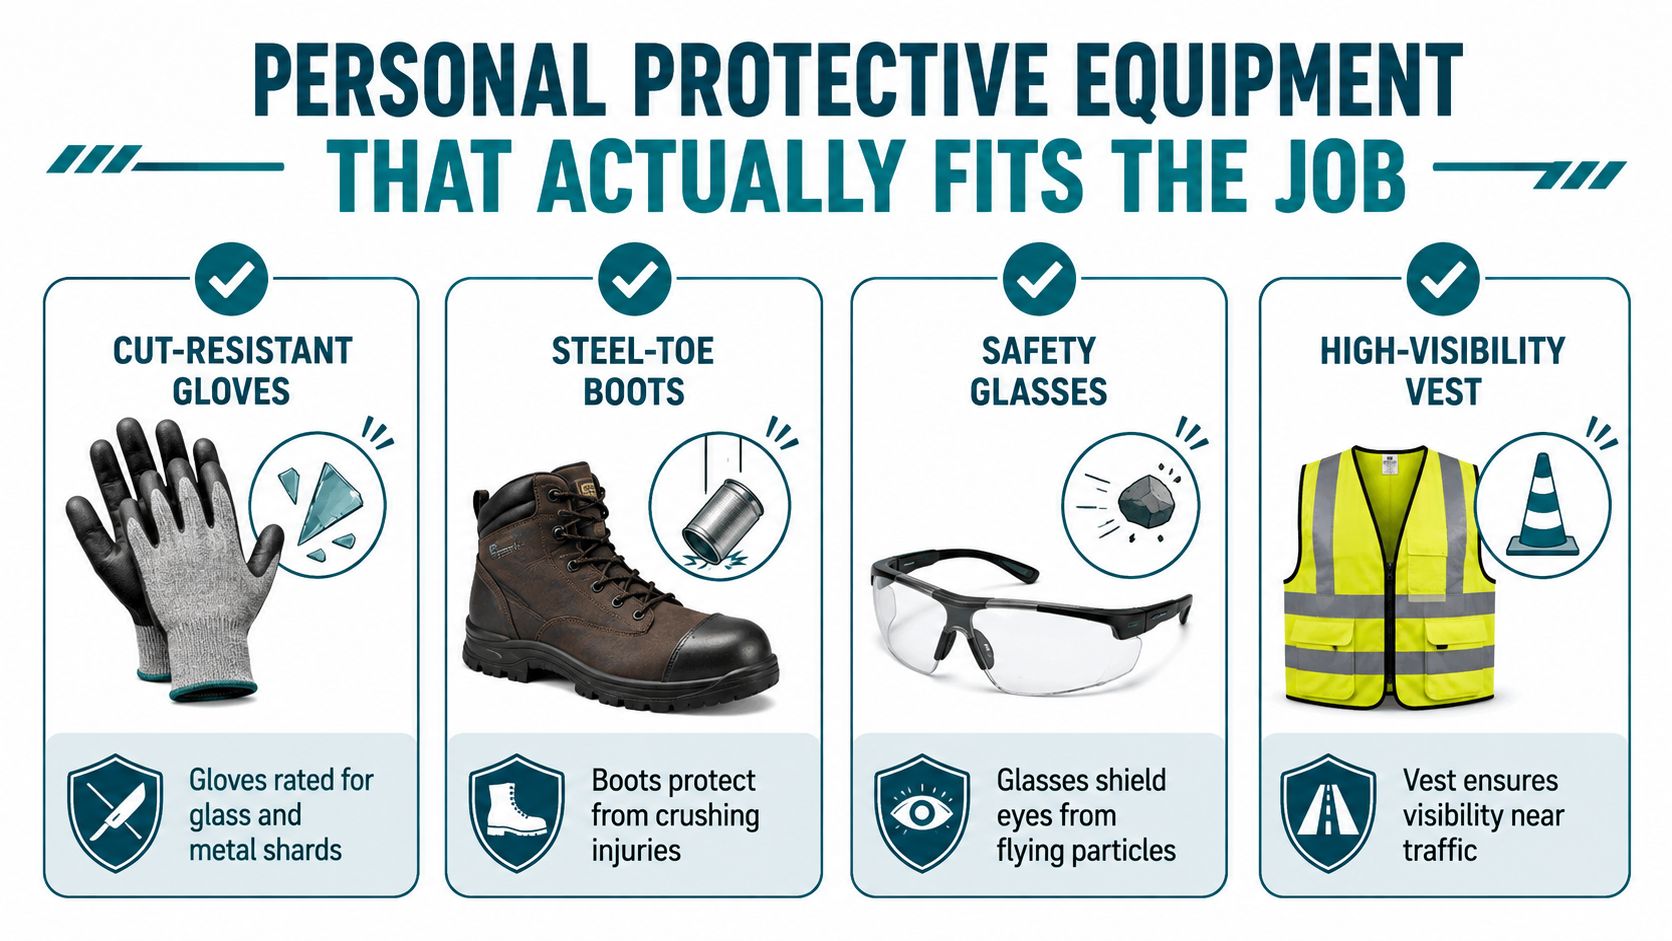
    Personal Protective Equipment That Actually Fits the Job

    PPE should answer a specific question: what can hurt this volunteer at this site? A pair of thin gardening gloves might feel comfortable, yet sharp cans, broken glass, and metal scraps can shred them quickly. Choose cut-resistant gloves rated for glass and metal, then check that each volunteer can grip a grabber without losing control.

    Learn more about volunteer trash pickup practices before you build your gear station. The right equipment supports the work, but it doesn't replace a site walk or a clear rule about suspicious objects.

    A safety infographic illustrating essential personal protective equipment like gloves, boots, glasses, and high-visibility vests for workplace protection.

    Match each item to the hazard

    • Cut-resistant gloves: Use them for glass, wire, cans, and metal fragments. Volunteers should use a grabber for sharp or sketchy items rather than testing an object with a gloved hand.
    • Closed-toe boots: Sneakers leave feet exposed to broken glass, uneven pavement, and dropped objects. Boots with ankle support help on rubble, curbs, and sloped alleys. Steel-toe protection can make sense where crushing hazards exist.
    • Safety glasses: Glasses should stay in place while volunteers bend, reach, and shake out debris. They protect eyes from dust, fragments, and particles kicked up by another person.
    • Long sleeves: A breathable long-sleeve shirt limits scrapes from brush, fencing, and rough concrete. On warm days, choose light fabric and add shade and water instead of sending people out in heavy layers.
    • High-visibility vests: Street-adjacent work needs a clear visual boundary. A vest helps drivers and cyclists see the crew, especially near intersections, bus lanes, and driveway exits. For teams that need coordinated colors or printed names, find safety vests custom options can help.
    • Knee pads: Ground-level work punishes knees on concrete and gravel. Knee pads make it easier to keep a stable position while sorting low debris, which reduces rushed reaches.

    Volunteers often forget sun hats, extra socks, and a personal water bottle. Those items look minor until a wet sock creates a blister or direct sun leaves someone tired and careless.

    Make sign-in a gear checkpoint

    At sign-in, ask each person to show gloves, boots, eye protection, and a visible vest when traffic is nearby. Keep spare gloves, glasses, socks, hats, and water available. If someone lacks the right equipment, move that person to a lower-risk task or pause the assignment until you can fix the gap.

    Lifting, Bending, and Carrying Without Paying for It Tomorrow

    A full trash bag looks manageable until it swings into a knee. A long stick seems light until it catches on a fence and twists your shoulder. I've watched both mistakes appear during weekend pickups, usually because someone wants to work faster than the load allows.

    Set your feet about shoulder-width apart. Keep your back flat, bring the object close, and use your legs to drive upward. The cue I use is “nose over toes.” It reminds you to bring your body over the load instead of reaching away from it.

    Use a partner before the load wins

    For heavy debris, ask for help early. Two volunteers should stand at similar heights, agree on the route, and count the lift out loud. The count gives both people a shared start and prevents one person from jerking upward while the other still adjusts their grip.

    Tires, long scrap wood, and awkward furniture need a team carry. One person steers while the other watches foot placement and obstacles. Keep the load close, walk slowly, and stop before a curb or turn instead of trying to pivot under pressure.

    Fix the two habits that cause trouble

    An overfilled bag can drag across the ground, split open, or swing into someone's leg. Use smaller bags, tie them before they become heavy, and place them at a collection point instead of carrying an unstable load across the site.

    A drag-along trash stick twists the shoulder when it catches on pavement, roots, or fencing. Break it into shorter pieces if you can do so safely, or carry it with a partner. Never yank against resistance. Stop, reset your feet, and change the route.

    “Nose over toes” works because it gives volunteers a movement they can check while they're working.

    If a volunteer reports back pain, dizziness, or a sudden sharp sensation, stop the task. A cleanup can wait. A person shouldn't gamble with an injury to finish one more bag.

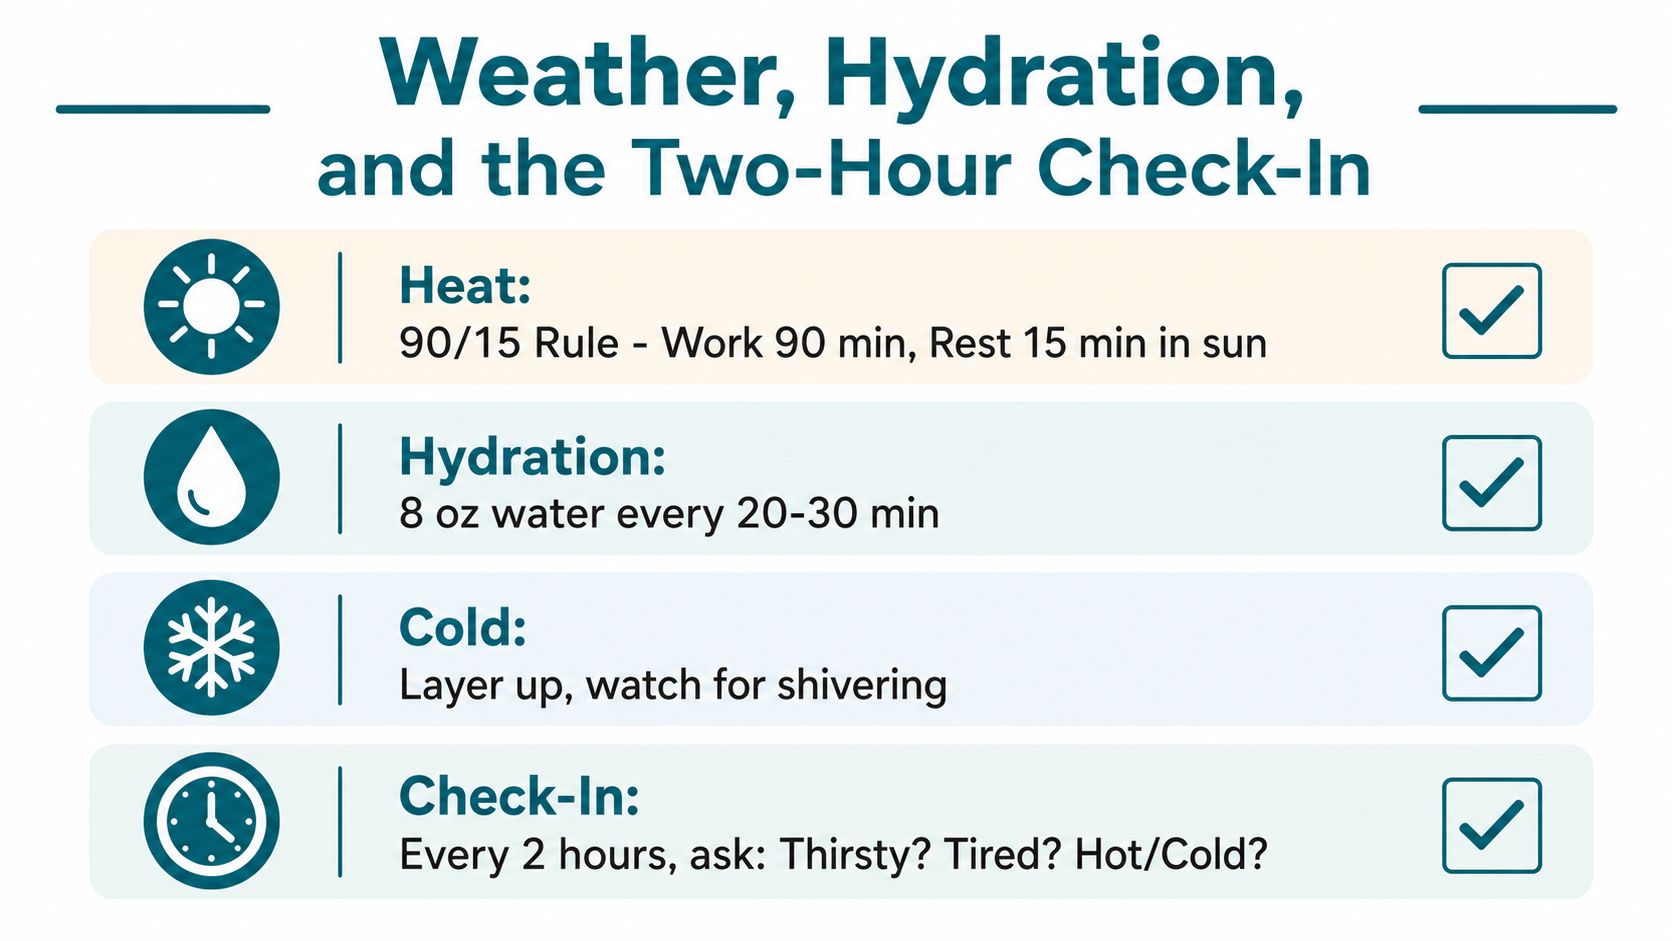
    Weather, Hydration, and the Two-Hour Check-In

    Chicago weather can change the job faster than the trash volume does. Heat drains judgment, cold stiffens hands, and lightning turns an open cleanup area into a place where nobody should work.

    For hot days above 85°F, use a 90/15 work-rest split. Work for 90 minutes, then take 15 minutes in shade or another cool location. Aim for 8 ounces of water every 20 minutes. Put water where volunteers can reach it without crossing traffic or walking back to the meeting point.

    A safety infographic titled Weather, Hydration, and the Two-Hour Check-In outlining health and safety protocols.

    Notice the quiet signs

    Crews often miss clammy skin, irritability, and skipped water breaks because the person still appears to function. A volunteer who snaps at a teammate or stops drinking may need shade, water, and a check from the safety lead. Use the heat exhaustion prevention tips as a planning reference, then give the group a simple response everyone understands.

    On mornings below 50°F, ask volunteers to layer clothing and bring gloves and a hat. Keep extra layers in the supply vehicle. Wet clothing and wind can make a mild morning feel much harsher, so watch for shivering, numb fingers, slow speech, and clumsy movement.

    Stop for thunder

    Stop work when thunder arrives within 30 seconds of a lightning flash. Move volunteers into a suitable shelter or vehicle, and wait 30 minutes after the last lightning strike before restarting. Don't leave this decision to the loudest person in the group. Name one safety lead who can end the shift.

    Use a named check-in pair

    Every two hours, a named pair should walk the group and ask three questions:

    1. Are you thirsty?
    2. Are you tired?
    3. Are you hot or cold?

    Log the answers and act on them. Rotate tasks, add a rest period, move someone into shelter, or end the assignment. A short conversation can catch a cramp before it becomes a hospital trip.

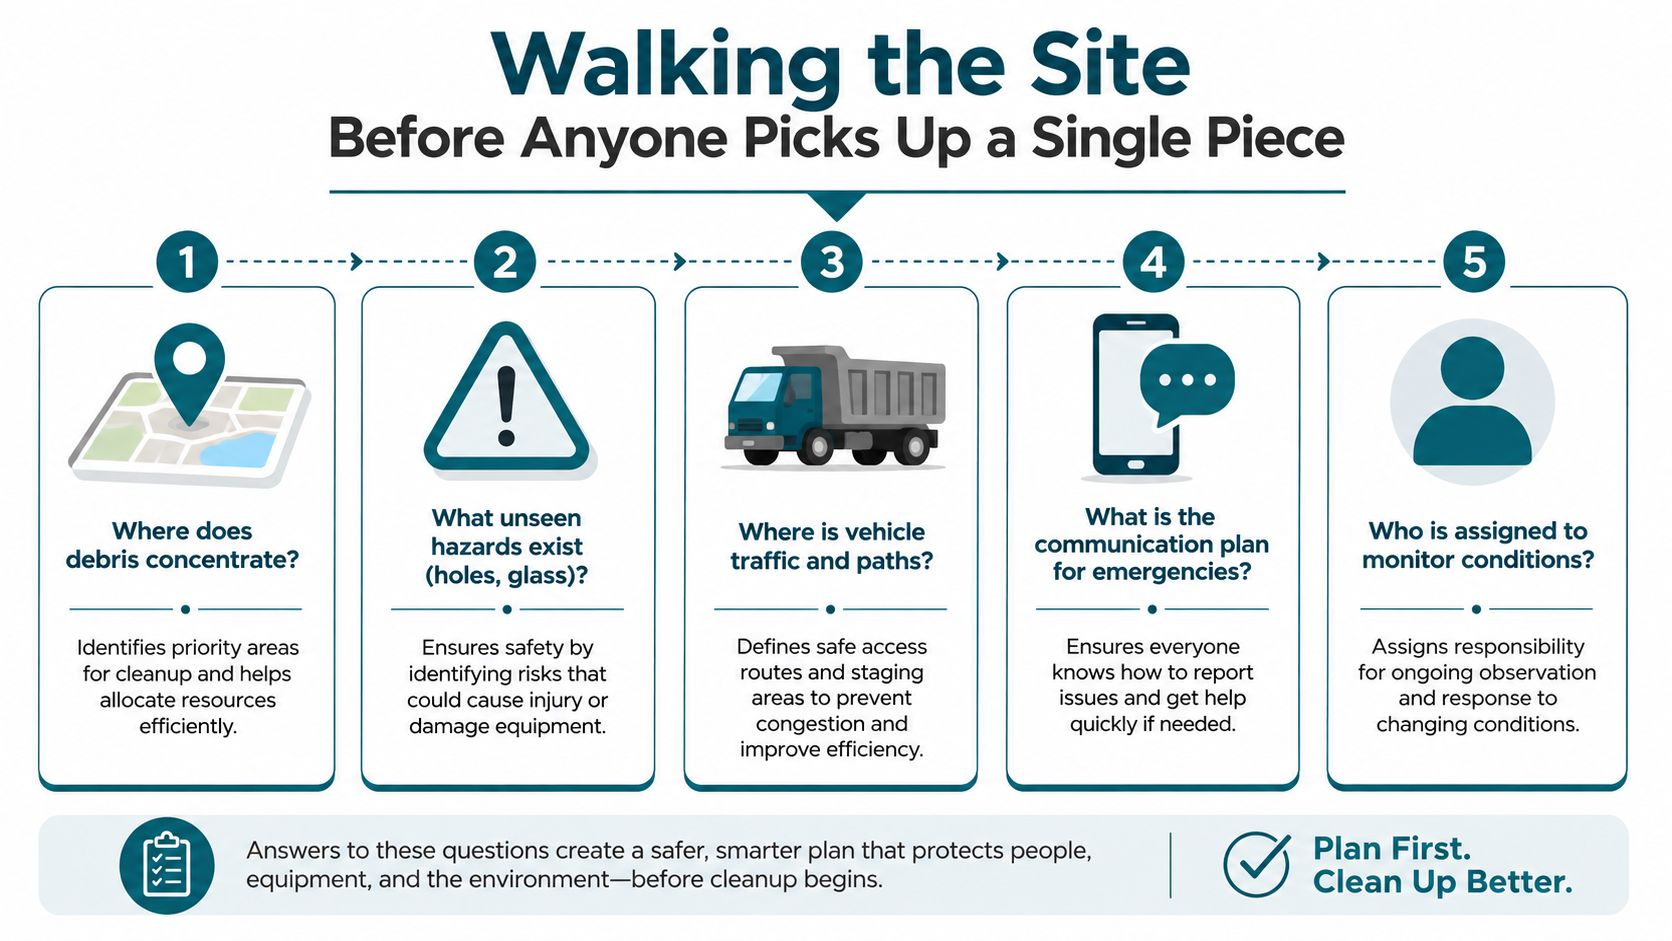
    Walking the Site Before Anyone Picks Up a Single Piece

    A five-minute site walk can rewrite the whole morning. I don't mean a casual glance from the parked car. Walk the actual route, look down, watch traffic, and ask questions that force the plan to meet the ground.

    The World Health Organization's prevention model begins with measuring the problem and identifying causes. A site walk does exactly that at street level. You're finding the conditions that a group briefing cannot reveal from a map.

    An infographic titled Walking the Site outlining five essential safety planning steps before beginning cleanup work.

    Ask five field questions

    • Where does traffic enter and exit? If cars cut through the cleanup zone, move sign-in away from the blind alley, assign a traffic watcher, or reroute volunteers.
    • What is underfoot? Look for holes, broken pavement, glass, mud, roots, and steep curb cuts. Mark the hazard, block the area, or give that stretch to a trained lead with the right equipment.
    • Where is water nearest? A distant water source creates skipped breaks. Put a hydration station where volunteers can reach it without crossing a roadway.
    • Where is shade or shelter? Identify the indoor partner site, warming vehicle, covered entrance, or shaded wall before people arrive.
    • What surprised me last time? Review the previous event. Was there a dumped mattress, unleashed dog, flooded alley, construction barrier, or pile that attracted unsafe attention?

    Turn observations into assignments

    Each answer needs an owner. A traffic problem needs a watcher. A glass-heavy patch needs a grabber and a controlled sweep. A weather concern needs a stop-work decision and a place to go.

    Take photos of hazards after the event, without exposing private information or identifying people. Add those images to the debrief so the next crew inherits a smarter map rather than the same surprise.

    First Aid Kits and Incident Reporting When Things Go Wrong

    A first aid kit should travel with the group, not sit locked in an organizer's car several blocks away. Stock nitrile gloves, gauze, trauma shears, cold packs, saline, a tourniquet, and a CPR face shield. Check the kit before volunteers arrive and replace anything used during the last event.

    Put gloves on before blood reaches your hands. If a wound looks serious, the person feels faint, or bleeding won't stop with direct pressure, call 911. Keep volunteers away from the scene so the responder has room to work.

    Follow four actions

    1. Assess the scene. Look for traffic, exposed glass, electricity, chemicals, or another danger before you approach.
    2. Clear the area. Move bystanders and stop nearby cleanup work.
    3. Treat or call 911. Give basic care within your training, and don't delay emergency help when the injury needs it.
    4. Send a runner. Assign someone to meet EMS at the nearest corner and guide responders through blocked streets or alleys.

    Organizers should also review practical guidance on common first aid mistakes at work. The point isn't to turn volunteers into medics. It's to prevent hesitation, confusion, and unsafe improvisation.

    Write the report while details remain clear

    A volunteer captain should complete the incident form within an hour. Record:

    • Time and weather: Include the work period, temperature conditions, rain, snow, hail, or wind.
    • Exact location: Name the block, alley, intersection, or cleanup zone.
    • What happened: Describe the action and hazard in plain language.
    • Witness names: Get names and contact details from people who saw the event.
    • Response: Note first aid, the 911 call, transport, or a decision to stop work.
    • Photos: Photograph the hazard and surrounding area when it's safe and appropriate.
    • Follow-up: Assign someone to contact the volunteer and someone to change the plan.

    A hidden shard once sliced a volunteer during a pickup. The injury report showed that the crew had skipped a glass sweep near the collection point. We changed the routine and added a pre-event hazard walk. The form did more than document pain. It showed us where our process had failed.

    The Volunteer-First Safety Checklist

    Print the checklist. Put a pen beside it. Assign every line to a person who can answer “done” before the group starts. A checklist that belongs to everyone often belongs to nobody.

    Pre-event

    • Site walk completed: Check traffic, footing, debris concentration, shelter, shade, water, and surprises from the last visit.
    • PPE stocked: Set out cut-resistant gloves, closed-toe boots guidance, eye protection, long sleeves, high-visibility vests, knee pads, hats, and spare socks.
    • Weather call made: Decide whether to proceed, shorten the route, add shelter, or cancel.
    • First aid staged: Place the kit where the safety lead can reach it quickly.
    • Contacts printed: Keep waivers, emergency contacts, the route map, and partner-site details together.

    On-site

    • Sign-in complete: Record arrivals and confirm basic gear.
    • Buddy assigned: Pair volunteers, especially in alleys, near traffic, and on unfamiliar routes.
    • Safety briefing delivered: Cover “nose over toes,” partner lifts, heat and cold rules, lightning, sharps, and the traffic plan.
    • Hydration station live: Put water where people can reach it.
    • Two-hour check-in scheduled: Name the pair and set an alarm.

    During cleanup

    • Gloves and high-visibility gear on: Check before volunteers leave the meeting point.
    • Three-foot debris pile rule active: Keep collected material in a controlled pile with room around it.
    • No lone workers in alleys: Keep buddies within sight or voice range.
    • Sharps protocol followed: Use a grabber and stop when an item looks dangerous or unknown.
    • Flaggers assigned: Place watchers at intersections, driveway exits, and street crossings.

    Post-event

    • Incident log reviewed: Discuss injuries and near misses before everyone leaves.
    • Near misses recorded: A fall that didn't happen still tells you something.
    • Kit restocked: Replace gauze, gloves, saline, cold packs, or any other used supply.
    • Debrief sent within 48 hours: Share route changes, weather lessons, hazard photos, and assigned fixes.

    A lakefront pickup once took a hard turn when hail arrived mid-shift. The organizer had printed the checklist, so tarps were already staged. The designated safety lead stopped the work, a buddy moved shivering volunteers toward the warming van, and one volunteer noticed the weather app change and called it out. The group rotated people indoors and completed a 15-minute handoff to the indoor partner site instead of leaving confused volunteers scattered along the route.

    The checklist worked because three real people owned the lines. A safety lead made the call. A buddy stayed with the affected volunteers. Another volunteer watched the forecast and spoke up. For more ideas on assigning repeatable operational tasks, review this facilities management checklists example, then adapt the format to your route.

    For organizers who want more support before the next event, volunteer coordinator training can help turn these written rules into a briefing people remember.


    Litter Caterpillars organizes Chicago cleanup events with safety briefings, grabber guidance, buddy awareness, and a volunteer-first approach. Visit Litter Caterpillars to join an upcoming cleanup, learn how the group prepares crews, and help make safer service a regular Saturday habit.

  • 8 Heat Exhaustion Prevention Tips for Volunteers

    8 Heat Exhaustion Prevention Tips for Volunteers

    Drink water every 15 to 20 minutes in the heat, move the hardest work to cooler hours, and start cooling down long before thirst hits. A good cleanup crew protects itself with shade breaks, loose light clothing, sunscreen, and a clear stop signal when someone starts feeling off.

    It always starts the same way on a Saturday morning. The Litter Caterpillars show up for a weekend cleanup, the air still feels easy, and the trash bags look lighter than the day ahead. Then the sun climbs, the pavement heats up, and the same people who felt fresh at 9 a.m. start moving like they're carrying bricks instead of litter.

    That's where a cleanup turns from “let's get it done” into “let's get it done safely.” I'd rather lose a few bags than lose a volunteer to heat exhaustion. The right move is to plan the shift before anyone grabs a picker, so the crew runs like a small field team instead of a bunch of people guessing in the sun.

    I think about heat safety as a group cleanup system. Water, shade, timing, clothing, and buddy checks all work together. If one piece fails, the rest have to carry too much weight. If the whole crew treats the day like a paced route, everybody gets home tired, sweaty, and fine.

    A weekend-morning group like Litter Caterpillars already has the right instinct, because the work feels social and practical at the same time. The trick is keeping that energy steady when the heat starts pushing back. Here are eight heat exhaustion prevention tips I use when I want the bags collected and the people still smiling.

    1. Drink Water Before, During, and After Your Cleanup Shift

    I learned fast that thirst is a late signal. By the time I feel thirsty on a hot cleanup day, my body has already started losing ground, so I treat water like gear, not like a backup plan. OSHA guidance and workplace safety sources say to drink about 8 ounces every 15 to 20 minutes in hot conditions, Texas safety guidance says workers should drink at least one pint every hour, and the World Health Organization advises 1 cup per hour and 2 to 3 liters per day while avoiding alcohol and limiting caffeine and sugar, because hydration should start before thirst does, not after it OSHA and related workplace heat guidance.

    Make water part of the rhythm

    I tell volunteers to sip on a timer, the same way they'd check their phone or scan the street for litter. That little habit keeps people from entering the red zone without noticing. It also helps if you're moving fast and not thinking about yourself, which happens all the time during a good cleanup.

    Bring a big bottle, then keep a second bottle cold at the site if you can. If plain water feels boring, a slice of lemon or lime helps people drink more without turning the cooler into a science project. I've found that the key win is consistency, because a crew that drinks early usually stays calmer, lighter, and easier to guide.

    Practical rule: if someone says they're “fine” but hasn't had a sip in a while, hand them water anyway.

    The same logic helps after the shift. Sweat doesn't stop just because the last bag is tied off, so I keep people drinking on the ride home and at the post-cleanup hangout. If you want the body to recover well, you can't treat the work window like the only time hydration matters.

    2. Wear Light-Colored, Loose-Fitting Clothing

    Clothes matter more than most first-time volunteers expect. Dark, tight clothing soaks up heat and traps it close to the body, while light colors and looser cuts help the body dump heat more easily. I've worn both on the same kind of morning, and the difference shows up fast once the sun gets serious.

    Dress like you plan to be outside for hours

    I usually reach for a white or light gray shirt on cleanup days, then pair it with loose shorts when the weather allows. If I know I'm going to be out for a long stretch, I'll pick breathable fabric instead of something thick and heavy. The point is simple, sweat has to evaporate if you want to cool down, and tight clothes fight that process.

    A wide-brimmed hat helps too, especially one with enough brim to shade the face, ears, and neck. If you want to go further, UV-blocking clothes make sense for long exposure days. I don't love seeing volunteers in dark jeans on hot pavement, because they usually regret that choice by the time the first water break arrives.

    • Choose light colors: White, light gray, and other pale shades reflect more sun than dark fabric.
    • Pick looser cuts: Air needs room to move around your skin.
    • Use breathable fabric: Cotton works well for many people, and moisture-wicking fabric helps when sweat runs heavy.
    • Add head coverage: A wide brim reduces direct sun on your face and neck.
    • Skip heavy denim: Dark jeans turn a cleanup into a slow bake.

    The trade-off is obvious. You may not look like you're headed to a photo shoot, but you'll feel better, move easier, and last longer. That's the goal when the work is trash pickup, not a runway.

    3. Take Regular Breaks in Shaded Areas

    I build breaks into every hot cleanup I run, because nobody earns points for pretending they're invincible. Shade is where a crew resets, drinks, and comes back with a body temperature that's closer to normal. OSHA's heat guidance and related public-health advice both push regular rest in shade, and the CDC archive says to limit exercise in hot environments and rest frequently in shade CDC heat safety archive.

    Treat the break like part of the route

    Every 30 to 45 minutes, I call for a stop. Ten or 15 minutes in the shade gives people time to sit, drink, talk, and notice if they're starting to wobble. That pause also changes the mood in a good way, because people breathe again and remember they're a team, not just a line of arms with trash grabbers.

    I scout for shade before a cleanup starts. A tree works, a building overhang works, and even a parked truck can work if it's the only option. If a site has almost no shade, I bring a pop-up tent or a large umbrella, because I'd rather carry one extra item than gamble with a volunteer's health.

    Shade is not a luxury on a hot day. It is part of the plan.

    Use break time to check faces, not just bags. If somebody looks flushed, sluggish, or unusually quiet, that's a cue to slow down. I want volunteers sitting fully down, too, because standing around in the heat isn't the same thing as resting.

    4. Recognize Early Heat Exhaustion Symptoms in Yourself and Others

    Heat exhaustion usually shows up in the middle of a cleanup, not at the start. A volunteer can keep bending, lifting, and walking for a while after judgment has already slipped, so the crew has to catch the warning signs early. I've seen people try to keep pace because they didn't want to slow the group down. That is how a small problem turns into a group problem.

    A volunteer providing water and shade with an umbrella to a woman suffering from heat exhaustion.

    Learn the warning signs before the heat hits

    The signs I watch for are heavy sweating, weakness, dizziness, nausea, headache, and muscle cramps. If someone starts moving slowly, looks pale, or stops answering in their usual way, I ask them to sit down right away. If I feel dizzy, I do not try to push through and prove anything, I stop, tell the crew, and get out of the sun.

    Buddy checks make this work better than a solo mindset. Pairing newer volunteers with experienced ones gives the group two sets of eyes on the same workload, and a quick verbal check-in can catch trouble before it gets worse. I like asking, “How are you really feeling?” because that question is direct enough to get a real answer. A volunteer who says they are fine but sounds off still needs attention.

    Crew culture matters here too. the health benefits of volunteering in a crew go beyond social connection, because people who know each other's pace notice when someone falls behind. That makes it easier to speak up without turning a safety check into a personal slight. Heat safety gets stronger when the group treats slowdown as normal information, not a weakness.

    When someone shows symptoms, I move them to shade, give them water if they can drink, and keep one person with them while the rest of the crew keeps working or stops with them. That response is simple, but it keeps the whole cleanup from drifting into confusion. A calm call, a shaded seat, and a buddy who stays alert can stop an emergency before it starts.

    5. Apply Sunscreen and Reapply Regularly

    Sunburn and overheating often show up together, and I don't treat them like separate problems. Your skin takes a hit from UV exposure, and burned skin has a harder time helping your body manage heat well. I apply sunscreen before I leave, then I reapply during the cleanup if sweat starts wiping it off.

    Use sunscreen like part of your uniform

    I put it on about 15 minutes before I head out, so it has time to set. For longer outdoor time, I use SPF 30 minimum, and SPF 50 makes sense when I know I'll be outside for hours. A full-body application takes more than a quick dab on the nose, so I don't rush it.

    Reapply after heavy sweating or after about two hours, and keep a small bottle in the cleanup kit so nobody has to improvise. Spray sunscreen can help when a group needs fast touch-ups without a mess. Cloudy weather doesn't give you a pass either, because UV rays still get through.

    I think of sunscreen as a shield, not a force field. It cuts down damage, but it only works when you actually use it.

    I've seen volunteers ignore sunscreen because the morning feels mild, then spend the afternoon rubbing their shoulders and necks because the sun won anyway. That kind of burn makes the rest of the day harder. If your skin starts to cook, your whole cleanup feels heavier.

    6. Adjust Your Work Intensity Based on Heat Index, Not Just Temperature

    Temperature alone can fool you. A humid day can make a moderate number feel much worse because sweat does not evaporate well, and your body loses one of its main cooling tools. That is why I check the heat index before a hot-weather cleanup, not just the temperature on my phone.

    Let the forecast shape the job

    If the heat index looks rough, I change the work plan before volunteers arrive. Heavy hauling turns into lighter sorting, sweeping, or bag staging. Shorter shifts make more sense too, because I would rather get a smaller area cleaned well than push people into a bad afternoon.

    Use the forecast like a traffic light. If the heat index is above 103°F, I treat that as dangerous and think hard about rescheduling or doing only minimal work. If it lands between 90 and 103°F, I expect frequent breaks and lighter tasks, not full-speed hauling. That call feels conservative at first, then smart when the crew finishes steady instead of fried.

    I tell volunteers the plan before they show up, because nobody likes discovering a heat-downshift after they have already committed their day. If I know the afternoon is going to be ugly, I also keep an indoor backup option or an early dismissal plan ready. How I organize a neighborhood cleanup in extreme heat starts with that kind of honest timing call.

    The trade-off is simple. You may collect less trash in one session, but you keep the crew healthy enough to come back next week. That matters more than trying to squeeze every last block into one hot push.

    7. Eat a Light Meal and Avoid Alcohol Before and During Heat Activity

    Hot work takes fuel, but heavy fuel can backfire. I eat something light before cleanup, usually carbs with a bit of protein, because I want energy without a stomach that feels like it's working a second shift. Heavy, fatty meals slow people down, and alcohol makes the whole situation worse by dehydrating the body.

    Keep the stomach calm and the energy steady

    A banana, toast, or yogurt usually sits better than a big greasy breakfast. If I know the cleanup starts late enough that people may show up hungry, I bring light snacks so nobody tries to work on fumes. Nuts, fruit, and energy bars are easy to hand out and easy to eat in the shade.

    Timing matters here too. Eating 2 to 3 hours before you start gives the body a chance to settle before you're moving in the heat. That spacing makes a volunteer feel less stuffed and less sluggish when the work starts.

    • Choose simple fuel: Carbs and light protein usually sit better than fatty food.
    • Bring backup snacks: Fruit, nuts, and energy bars help late arrivals.
    • Avoid alcohol before and during heat work: It dries you out when you need fluids most.
    • Wait on celebratory drinks: If you're still hot and sweaty, give your body time first.

    I've seen post-cleanup beers turn into a bad idea fast when people are still overheated. Wait until evening if you want one. Your body will thank you for not asking it to cool down while you're handing it alcohol at the same time.

    8. Avoid Peak Heat Hours by Scheduling Cleanups for Morning or Early Evening

    This is the move I trust most. I schedule weekend cleanups in the morning because it gives us cooler air, fresher people, and less friction before the day gets mean. The sun tends to hit hardest between 10 a.m. and 4 p.m., with the worst stretch usually between noon and 3 p.m., so I want the hard work done before that window bites down Litter Caterpillars cleanup timing.

    Start early and the whole day gets easier

    For summer cleanups, I like a start time of 9 a.m. or earlier. If we absolutely have to work later, I'd rather wait until 4 to 5 p.m. than drag people through midday heat. Morning cleanups also give me more control over pacing, because I can plan a longer route when the temperature is still kind.

    Clear timing helps volunteers, too. If they know the event starts early, they can drink water before leaving home, eat properly, and show up already prepared. That makes the whole group easier to manage, because nobody arrives late and overheated before the work even starts.

    Early scheduling is the cheapest heat tool I know. It doesn't cost more gear, it just costs a little discipline.

    I like weekend mornings for another reason. The people who show up early usually want to be there, and that energy helps the crew move with purpose without rushing. It's a cleaner rhythm, and it gives us a better shot at finishing strong without anyone getting cooked.

    8-Point Heat Exhaustion Prevention Comparison

    Item 🔄 Implementation ⚡ Resources ⭐ Expected effectiveness 📊 Ideal use case 💡 Key tip
    Drink Water Before, During, and After Your Cleanup Shift Low, habit + reminders Minimal, bottle, cooler ⭐⭐⭐⭐ Any outdoor cleanup, especially hot/long shifts Pre-hydrate 2–3 hrs; sip every 15–20 min; bring ≥32 oz
    Wear Light-Colored, Loose-Fitting Clothing Low, choose clothing Minimal, light breathable fabrics, hat ⭐⭐⭐⭐ Sunny hot days, prolonged exposure Use breathable fabrics and a wide‑brim hat
    Take Regular Breaks in Shaded Areas Medium, schedule and enforce breaks Low, shade, umbrella or pop‑up if needed ⭐⭐⭐⭐ Strenuous or long cleanups in heat Break every 30–45 min for 10–15 min; sit and hydrate
    Recognize Early Heat Exhaustion Symptoms in Yourself and Others Medium, training + buddy checks Low, training time, monitoring ⭐⭐⭐⭐⭐ All group activities; critical for volunteer safety Learn symptoms; check volunteers every 30 min; act early
    Apply Sunscreen and Reapply Regularly Low, routine application Low, SPF30+ sunscreen, carry spare ⭐⭐⭐ Sunny days, long exposure Apply 15 min before; reapply every 2 hours or after heavy sweating
    Adjust Your Work Intensity Based on Heat Index, Not Just Temperature Medium–High, monitoring and planning Low, heat index data, alternative tasks ⭐⭐⭐⭐ Humid climates or high heat-index days Check heat index morning; lighten tasks or reschedule >103°F
    Eat a Light Meal and Avoid Alcohol Before and During Heat Activity Low, meal timing planning Minimal, light snacks ⭐⭐⭐ Volunteers who come straight from home or long shifts Eat 2–3 hrs before; choose light carbs/protein; skip alcohol
    Avoid Peak Heat Hours by Scheduling Cleanups for Morning or Early Evening Low–Medium, schedule coordination Minimal, timing adjustments ⭐⭐⭐⭐⭐ Summer cleanups; high daytime temperatures Start before 10 a.m. (ideally ~9 a.m.) or after 4 p.m.; communicate time clearly

    Leave the Cleanup for Another Day

    When I run a hot-weather cleanup, I keep the routine simple. I check the heat index the night before and again in the morning, then I move the start time if the forecast turns ugly. I pack water, shade, sunscreen, and snacks, then I brief the buddy system so every volunteer has someone watching out for them.

    I also set break times before anyone starts grabbing bags. That way, the rest stops feel normal instead of like punishment. If the day gets hotter than expected, I cut the workload, switch people to lighter tasks, or end early. A good cleanup plan bends before people do.

    The emergency response should stay just as plain. If someone shows heat exhaustion signs, I move them to shade, cool them, and give water when they can drink. Then I keep monitoring them, and I get help if symptoms don't improve or if they turn severe. I'd rather make that call early than gamble on somebody's pride.

    That's the volunteer-first way I like to run a crew. The bags can wait, the block can wait, and the next stretch of litter can wait too. A safe, happy volunteer comes back next week, and that gives you more cleanups, more trust, and a crew that lasts.


    If you want to clean Chicago without burning out your people, join Litter Caterpillars. We run volunteer-first cleanups that keep safety, timing, and teamwork at the front of the day, so you can help your neighborhood and still feel good when you head home.

  • 8 Essential Blizzard Safety Tips for You and Your Crew

    8 Essential Blizzard Safety Tips for You and Your Crew

    The first time we picked up trash, there were just three of us, and Chicago surprised us with a burst of wild weather. We huddled under a tree, watched rides cancel one after another, and learned fast that cold is more than discomfort, it changes the whole mood of a day. I carry that memory into every winter cleanup, because blizzards ask the same question every time, who is prepared, who is calm, and who is willing to look out for the people nearby?

    That is why I treat blizzard safety tips like field lessons, not theory. You can use them at home, on a block walk, on a volunteer shift, or while checking on a neighbor who lives alone. The goal is simple, stay warm, stay connected, and stay sharp enough to help yourself and the people around you when the snow starts stacking up.

    1. Stay Inside During the Storm

    The cleanest decision is often the hardest one. When the wind starts cutting across the street and the snow turns the world into a white wall, I want you to stay where you are and wait it out. A short trip to the car, the mailbox, or the corner store can turn ugly fast when you cannot see well and you lose your footing on ice.

    I learned this the hard way from winter volunteer work. If I see the forecast turn bad, I cancel the cleanup and move it to another day, because no bag of litter is worth a twisted ankle or a stranded volunteer. That same judgment works at home too. Stock snacks, water, and something to do before winter starts, because boredom gets loud when you are stuck inside and your phone battery is low.

    Practical rule: if you can wait, wait.

    Use the time to charge your phone, check your heat, and tell friends or family you are staying put. A steady message like that keeps people from worrying and keeps you from making a careless dash outside just to “check.” If you need a place to start with neighborhood-minded preparation, I like the simple approach shared on Litter Caterpillars neighborhood safety, because it fits real life, not fantasy weather.

    A cold storm also eats your attention. If you have one eye on the road and one eye on the windows, your judgment slips. I would rather see you plan your next volunteer day, make soup, or sort out a future weekend cleanup than gamble with a blizzard outside your door.

    A woman wrapped in a blanket sits by a snowy window, holding a warm steaming mug.

    2. Dress in Layers with Waterproof Outer Gear

    A volunteer in our group once showed up for a winter cleanup in a heavy coat that looked warm from the parking lot. Ten minutes in, sweat had soaked the inside, the wind had found every seam, and she spent the rest of the shift flexing numb fingers instead of picking up trash. That day made the lesson plain. Winter clothing has to protect against wind and moisture while still letting you move.

    The CDC recommends several layers of loose-fitting clothing, plus a hat, scarf or knit mask, mittens, and water-resistant boots, and the National Weather Service warns that wet clothing, sweating, and overexertion speed up heat loss and raise hypothermia risk. In Chicago volunteer work, I have seen people arrive in the wrong coat and lose focus fast, because cold hands and wet sleeves steal attention from the job in front of them. A good jacket is not about style in a storm. It is about staying useful when conditions turn.

    What I look for before I leave the house

    • Start with the right fabric: choose wool or synthetic materials, because cotton hangs onto moisture and leaves you cold.
    • Block wind and snow: wear a windproof jacket over your insulation and add snow pants if you expect deep slush.
    • Protect your head and face: wear a hat, and add a balaclava or neck gaiter when the wind cuts hard.
    • Carry backup pieces: bring extra gloves and socks, because wet hands and feet ruin a day faster than bad attitude ever will.
    • Seal the gap at your boots: tuck your pants into your boots when snow is deep enough to creep inside.

    I keep telling volunteers this because comfort and safety are tied together. If your clothes hold sweat, you cool down as soon as you stop moving. If your gloves soak through, your hands stop helping you. Layers work like a cleanup crew, each piece does one job, and the whole group works better when no one is left exposed.

    3. Check Weather Forecasts and Create a Communication Plan

    I never trust my mood when winter is coming, I trust the forecast. On one Chicago volunteer shift, I watched a group leave the warmth of the meeting hall with clear skies overhead, only to meet harder wind and drifting snow a few blocks later. That kind of surprise is why I check wind, temperature, visibility, and timing before any outdoor plan, because a calm-looking day can turn mean once the gusts rise and the road starts to disappear under blowing snow.

    That same lesson carries over to volunteer groups. If I see a storm moving in, I call it early and I say it plainly, because last-minute confusion makes people split off, rush decisions, and miss the message. Everyone needs the same update, the same expectations, and the same contact list, so nobody is guessing while the snow is already falling.

    A communication plan should feel boring before the storm

    Stay off guesswork. Put your plan in place while the sky is still clear.

    • Use more than one forecast: compare weather alerts, hourly updates, and local forecast details instead of betting on one app.
    • Watch wind chill, not just temperature: the air can feel far worse than the number on your screen.
    • Set group chats early: build them before winter arrives, so you are not adding names while conditions get rough.
    • Share your route: tell at least one person where you are going and when you expect to be back.
    • Choose a cancel rule now: decide ahead of time what weather means “we stop.”

    In our Chicago cleanup work, that kind of planning keeps a simple outing from becoming an emergency. I have seen volunteers arrive steadier, ask better questions, and stay focused when they already know who to text, when to turn back, and who is watching the forecast from home. A clear plan does more than protect one person. It gives the whole group a steadier way to move through a hard day, and that is how a volunteer crew turns winter caution into shared strength.

    I also keep one local resource in mind for people who may need support if plans fall apart, and I share the link for the Casa Catalina Food Pantry in Chicago when a storm could complicate access to food or other basics. That kind of follow-through matters, because communication is not only about canceling a shift. It is about making sure people know where help is, who is safe, and how to stay connected when the weather gets sharp.

    4. Stock Essential Supplies Before Winter Arrives

    I learned this lesson on a January supply run for our volunteer group. The forecast had looked manageable that morning, then the snow thickened fast, and the people who had already stocked their homes were the ones who stayed calm when the roads turned slick and the stores started thinning out. That is why I shop for winter before I am tired, before the wind starts howling, and before I have to make decisions with cold hands.

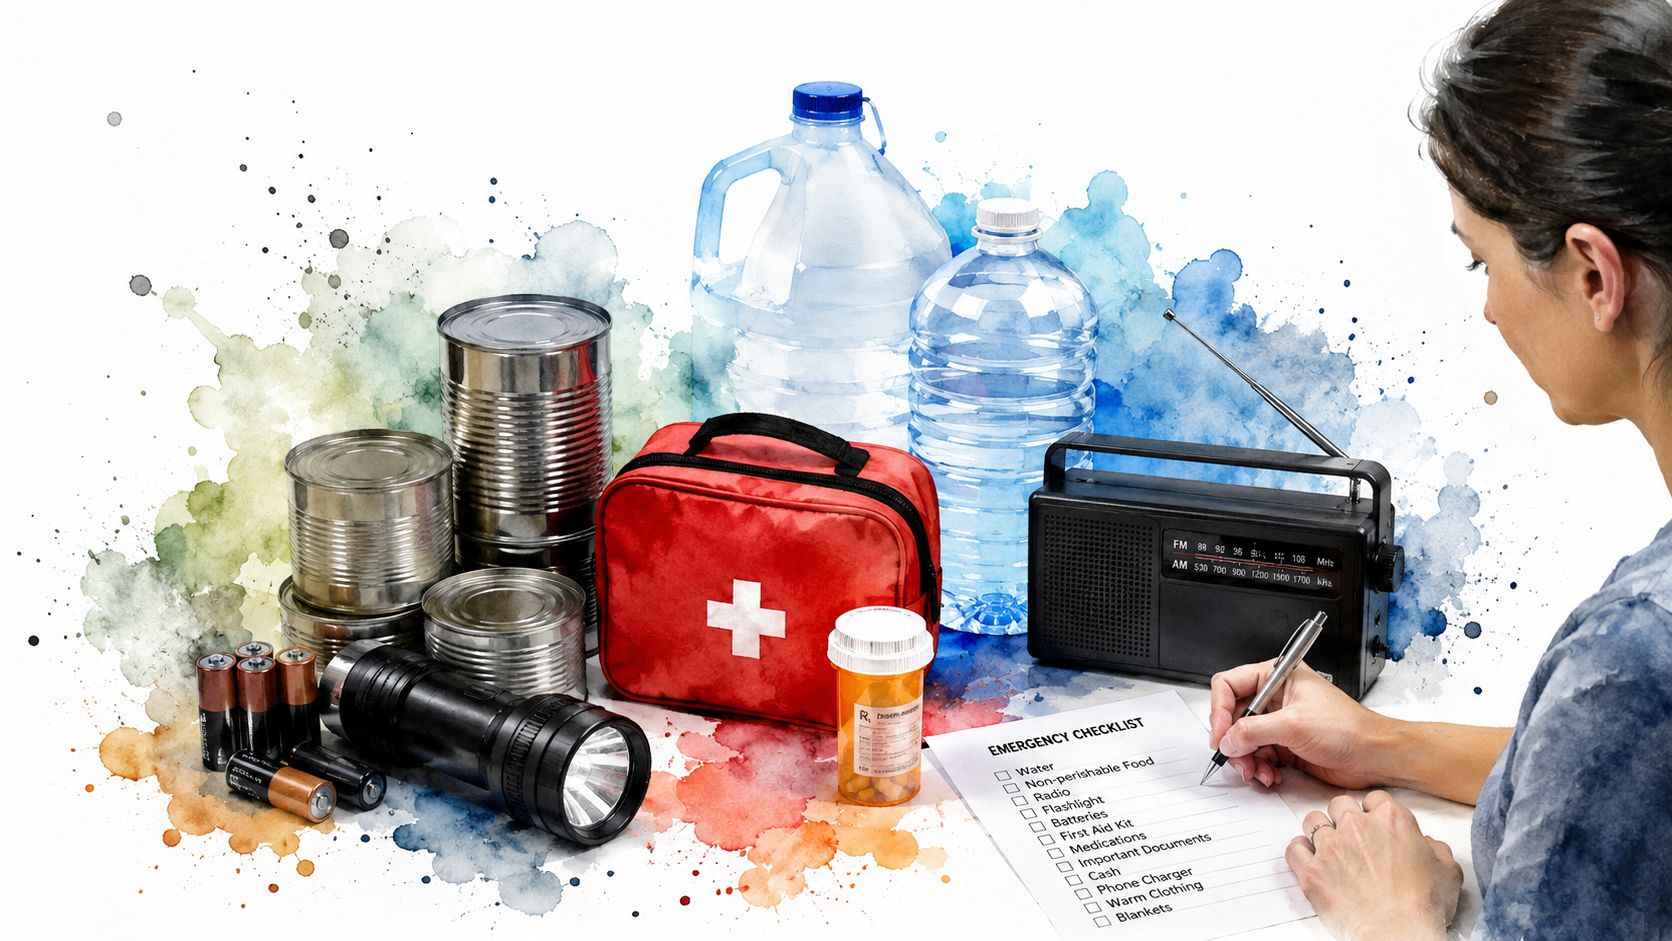
    Food, water, batteries, a first aid kit, and the medicines you already rely on should all be ready before the first real storm. Ready.gov recommends a go-kit with at least three days of supplies, and I treat that as the baseline for anyone who lives where snow can trap you indoors. The point is not to build a bunker. It is to keep panic out of the picture when delivery slows, store shelves empty, and the street outside becomes a place you should not try to drive through. I have seen how much steadier people feel when the pantry and medicine cabinet are already set.

    My winter shelf has a plain rhythm to it, built from the kinds of things that keep a household going when the weather does not cooperate.

    • Food you will eat: canned beans, peanut butter, dried fruit, instant oatmeal, soup, pasta, rice, crackers, and a few comfort foods like tea, hot cocoa, or shelf-stable applesauce.
    • Water stored safely: use food-grade containers, and keep enough to cover several days.
    • Light and power backups: flashlights, extra batteries, a battery-powered radio, and candles you can use carefully if the power goes out.
    • Medicine with labels intact: keep prescriptions in original bottles, plus over-the-counter pain relievers, allergy medicine, and any daily inhalers or supplements you depend on.
    • A simple paper list: print your supplies and tape the list where you can see it, so you can check what needs replacing without guessing.
    • A place to find more help: if a storm puts a strain on your household, keep the page for the Casa Catalina Food Pantry in Chicago close by, along with other local resources you trust.

    I also think about the people in my life who depend on me, because a stocked shelf lowers stress before a volunteer shift and after one. If I know my home is ready, I can focus on helping others instead of worrying that my family will have to scramble while the snow piles up. That peace of mind matters in a blizzard. It gives you room to stay useful, and it gives the people around you a steadier example to follow.

    A person checking off items on an emergency preparedness list next to supplies like water, food, and medicine.

    5. Know the Signs of Frostbite and Hypothermia

    The cold does not always hit like a siren. Sometimes it creeps in through your fingers, your ears, or your nose, and the first sign is just numbness or tingling. Frostbite can make the skin turn white or waxy, and if you ignore that signal, you can turn a minor problem into a serious one.

    Hypothermia is trickier because it can fool the person who has it. At first, you shiver. Then you may feel confused, clumsy, or sleepy, and that is where danger gets nasty, because your own brain can stop warning you. In a group, I watch for the person who stops talking about the cold. Silence can mean they are too far gone to complain.

    The cues I look for in the field

    When I volunteer outdoors, I keep an eye on simple body-language tests. If someone starts stumbling, mumbling, grumbling, or fumbling, I treat that as a red flag for hypothermia. If I see white patches on skin, I move fast toward warmth and get the person inside.

    Do this early, not late. Check yourself and the people around you often enough that numb fingers never get ignored.

    • Check every 15 minutes in extreme cold: small injuries can grow fast when wind and wet snow are working against you.
    • Speak up about numbness immediately: no one should tough it out until the damage spreads.
    • Know the difference: frostbite is local cold injury, while hypothermia affects the whole body.
    • Never rub frostbitten skin: that can cause more harm.
    • Move slowly and gently: a person with hypothermia needs calm handling, not rough urgency.
    • Call 911 for serious symptoms: if someone is confused, hard to wake, or getting worse, get help.
    • Use a buddy system: let someone else watch you, because self-monitoring fails when your judgment slips.

    That quiet moment, when somebody stops joking or complaining, has saved my attention more than once. I do not wait for collapse. I treat odd silence as a warning and warmth as the next move.

    6. Keep Your Car Winter-Ready and Know What to Do If You Get Stuck

    I prepare my car like it might turn into a tiny shelter for a while, because sometimes it does. The National Highway Traffic Safety Administration reported 101,390 police-reported crashes in 2023 when snow or sleet was present, including 320 fatal traffic crashes and 22,293 injury crashes (NHTSA winter driving tips). Those numbers are enough for me to respect the road when the weather turns mean.

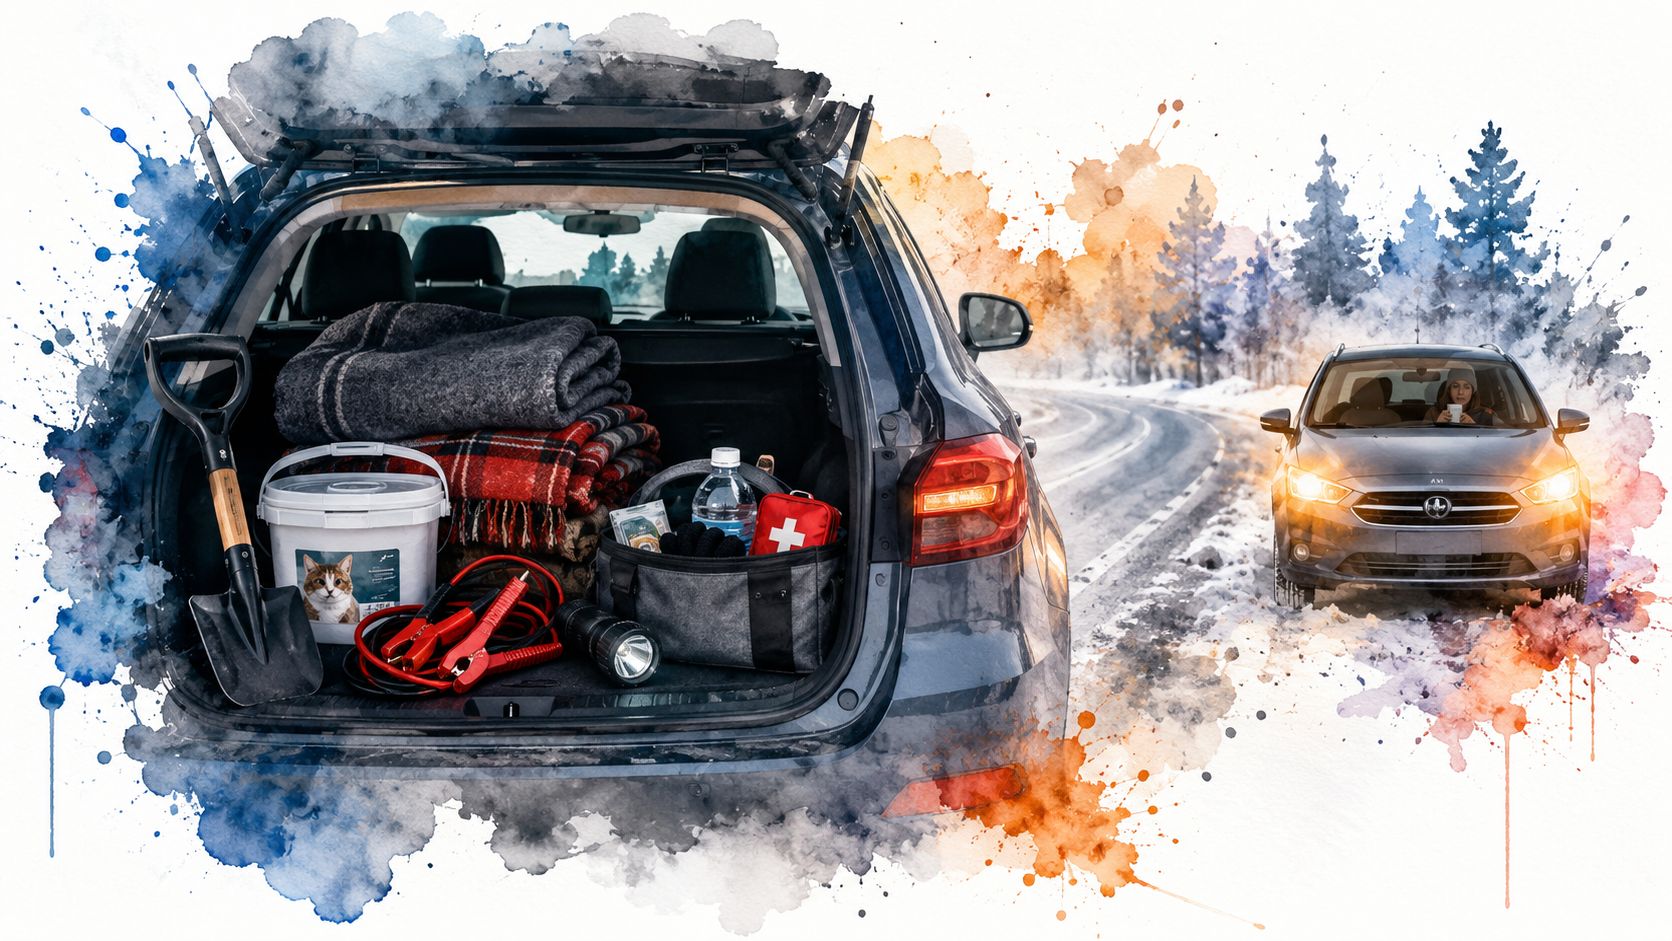
    That means I check tire tread, keep jumper cables in the trunk, and make sure I have a flashlight, blankets, water, snacks, and sand or kitty litter for traction. I also keep my fuel tank from running low in winter, because a car that quits at the wrong time gives you one more problem than you need. If the forecast looks rough, I would rather carpool, use transit, or stay home than roll the dice on a road that can trap me.

    Open car trunk packed with winter emergency supplies next to a snowy road with a vehicle driver.

    If you get stuck, stay in the car unless help is clearly close. The car gives you shelter, and leaving it can put you at risk of disorientation and fast heat loss. Turn on hazard lights so rescuers can spot you, crack a window a little for ventilation, and run the engine and heater only as needed so you stay warm without losing your sense of space.

    I keep the rule simple for volunteers and friends. If the storm is ugly, the safest drive is often the one you never start. If you do have to drive, tell somebody your route and keep your phone charged before you pull out.

    7. Stay Connected and Account for Vulnerable People

    A blizzard changes what kindness looks like. A neighbor who can handle a snowy walk to the store might still worry about someone older, someone on disability support, or someone living alone with a weak heat source. I make it a habit to check on the people around me before the storm gets bad, because waiting until the roads are ugly can turn a simple call into a missed chance.

    That is where real community work pays off. When I know the names of the people on my block, I know who needs medication, who might need food, and who should not be left alone too long. I also know that trust matters. If I have shown up before the storm, a knock on the door during the storm feels normal instead of invasive.

    The Red Cross points out that winter guidance often talks about staying inside, monitoring weather, and checking on others, but it leaves a gap around the messy part, how to keep a group calm and functional over several days of confinement (Red Cross winter storm guidance). I fill that gap with simple habits. I set check-in times, I make sure people know who to call, and I keep the buddy system loose enough to be useful and firm enough to matter.

    What I look for before the snow gets deep

    • Make contact early: do not wait for the crisis to exchange numbers with neighbors.
    • Learn who needs power: some people rely on medical equipment that can't sit through an outage.
    • Keep emergency contacts handy: write them down in case a phone dies.
    • Check even when people say they are fine: pride makes people underreport need.
    • Bring supplies if you visit: a warm blanket or extra food can help immediately.
    • Report serious concerns when needed: if you think someone is at risk, act on it.

    I learned this same habit through what community resilience looks like in practice. The point is not to become heroic, it is to become dependable. A connected block handles a blizzard with less panic because people already know who needs a hand.

    8. Have a Plan for Heat and Power Loss

    Snow and ice can take out power lines in a few rough hours, and then the house gets quiet in a way that feels wrong. Cold indoors is a problem I never want to improvise around, because once heat disappears, the clock starts moving fast. I want a backup heating plan before winter even begins.

    Ready.gov says generators and fuel should be used outdoors and at least 20 feet from windows, doors, and attached garages, which matters because carbon monoxide can build up without warning (Ready.gov winter weather). I keep that rule in plain language in my head. If something burns fuel, I do not put it inside the living space, and I do not cut corners because I feel cold.

    A real backup plan can look simple

    A fireplace, a wood stove, a safe generator setup, or propane or kerosene space heaters can help if you already know how to use them. I also keep carbon monoxide detectors that do not depend on the power staying on, because a quiet alarm is still an alarm. Extra blankets, sleeping bags, and a plan for where to go if the house gets too cold all matter too.

    If I need a warm place, I want that answer ready before the storm arrives. I keep a short list of warming centers and nearby neighbors who have backup heat, because standing in a freezing house and deciding what to do is a bad place to start. I also never use a stove, grill, or oven to heat a home. That shortcut can turn a power outage into something far worse.

    I have seen how much calmer people get when they know their options in advance. Some go to a neighbor, some head to a warming center, and some stay put because their fireplace or backup setup is ready. That decision should happen on a calm day, not in the middle of a freezing night.

    8-Point Blizzard Safety Comparison

    Item Implementation Complexity 🔄 Resource Requirements ⚡ Expected Outcomes 📊 Ideal Use Cases 💡 Key Advantages ⭐
    Stay Inside During the Storm Low 🔄, simple decision/reschedule Low ⚡, charged phone, basic prep 📊 Very high safety; fewer rescue needs Severe blizzard, whiteout or high winds ⭐ Maximizes personal and public safety
    Dress in Layers with Waterproof Outer Gear Medium 🔄, knowledge and dressing time Medium ⚡, quality layers and waterproof gear 📊 Sustained warmth; tolerates longer exposure Outdoor work/volunteering in cold/wet conditions ⭐ Effective thermal regulation; flexible removal
    Check Weather Forecasts and Create a Communication Plan Medium 🔄, ongoing monitoring & coordination Low ⚡, apps, group chats; some admin time 📊 Better timing, organized cancellations, fewer surprises Group events, volunteer meetups, travel planning ⭐ Improves decision-making and group safety
    Stock Essential Supplies Before Winter Arrives Low–Medium 🔄, one-time setup, periodic maintenance Medium ⚡, food, water, batteries, storage space 📊 Self-sufficiency for days; reduced panic & trips Staying home during prolonged snow/road closures ⭐ Enables calm preparedness and basic survival
    Know the Signs of Frostbite and Hypothermia Low 🔄, learnable awareness Low ⚡, training/education, routine checks 📊 Early detection reduces severe injury & fatalities Any outdoor exposure; supervising groups ⭐ Life‑saving recognition; enables timely medical action
    Keep Your Car Winter-Ready and Know What to Do If You Get Stuck Medium 🔄, maintenance and kit readiness Medium–High ⚡, tires, emergency kit, fuel 📊 Increased survivability if stranded; fewer accidents Winter travel, remote routes, emergency egress ⭐ Car as shelter; improved traction and signaling
    Stay Connected and Account for Vulnerable People Medium–High 🔄, relationship-building and checks Low–Medium ⚡, time, contact lists, coordination 📊 Fewer unnoticed emergencies; stronger community resilience Neighborhoods with elderly/isolated residents ⭐ Prevents crises among vulnerable populations
    Have a Plan for Heat and Power Loss Medium–High 🔄, planning, testing and safe operation High ⚡, generators, fuel, alternative heat sources 📊 Maintains warmth during outages; reduces health risks Areas prone to outages or long storms ⭐ Sustains life‑support needs; reduces evacuation need

    Be the Calm After the Storm

    True bravery is not loud when the snow stops. It shows up in the quiet part after the wind dies down, when you check on a neighbor, clear a safe path, or make one steady call that keeps a family from spiraling. I have learned that the best winter prep is less about looking tough and more about staying useful.

    That is the heart of what we do at Litter Caterpillars. We pick up trash, we build habits, and we build trust, so people know each other before a storm asks for help. A blizzard gives you a chance to practice that same spirit at home, on your block, and with the people who count on you.

    You do not need to be perfect to be dependable. You need a plan, a few good habits, and the willingness to act before fear gets louder than judgment. When you prepare well, you give yourself room to help someone else breathe easier.

    That is growth, too. It is the kind that shows up in boots, in warm gloves, in a charged phone, and in the message you send to the person who lives down the hall. When the road looks bad and the sky turns white, I want you to be the person who stays calm, stays inside when needed, and shows up for your community when it counts.


    If you want more chances to build that kind of steady, service-minded confidence, join the work at Litter Caterpillars. We clean Chicago together in rain, snow, and heat, and we do it in a way that helps people make friends, practice bravery, and look out for one another. Come visit us and see how winter readiness and community service fit together in real life.